In this article, we are going to learn how to upload Download and Delete files in Azure Blob Storage using ASP.NET Core in simple steps.

What is Azure Blob storage?
Azure Blob storage is Microsoft’s object storage solution for the cloud.
Blob storage is optimized for storing massive amounts of unstructured data.
Unstructured data is data that doesn’t adhere to a particular data model or definition, such as text or binary data. Referenced from:- https://docs.microsoft.com/en-us/azure/storage/blobs/storage-blobs-overview
- Creating application ASP.NET Core Application
- Installing WindowsAzure.Storage package from NuGet
- Create a storage account
- Getting access keys
- Adding Access Keys to appsettings.json file
- Adding DemoController and injecting IConfiguration for accessing method.
- Download Azure Storage Explorer
- Connect to Azure Storage
- Implementing UploadFromByteArrayAsync method to upload file
- Implementing UploadFromStreamAsync method to upload file
- See All Blob files
- Download file from Azure Blob Storage
- Delete data from Azure Blob Storage
Let’s start with creating an application.
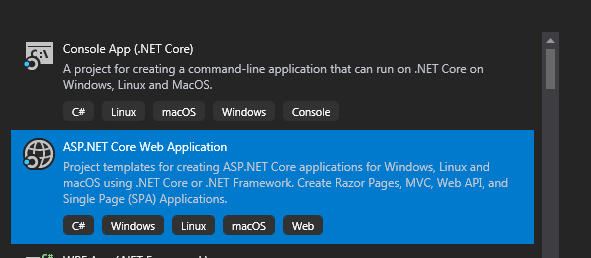
Creating ASP.NET Core Application
Next, we are going to set Project Name “WebBlobDemo” and location. In last part, we are going to choose .Net Core framework and ASP.NET Core Version 3.1 as the framework for application and few advance settings for such as configuring https and enabling docker we are not going to enable docker settings for this project.

Now finally click on create button to create a project.
Project structure
The project structure generated according to the configuration.

After creating project next, we are going to install below package from NuGet Packages.
Installing WindowsAzure.Storage package from NuGet

Create a storage account
We are going to create a Storage Account on Azure.
After login into the azure portal and Navigate to Storage Account as shown below.

Next click on Add button to Add new Storage Account.
After clicking on create storage account new first thing we are going to choose is the subscription you have, next create/select resource group after that, we are going to enter Storage account name as “demostoragedata” next selecting location whichever is right for you for this demo, I am going to choose “South India” location. Next, we are Selecting Performance options, here we have Standard Storage and Premium storage option we are going to select “Standard ” for this demo. Next comes your account kind we are going to choose “General-purpose v2” and in replication, we are going to choose “Read-access geo-redundant storage (RA-GRS)” and last option access tier we going to choose “Hot storage” at last click on review + create button.
Note: – Standard storage accounts are backed by magnetic drives and provide the lowest cost per GB. They’re best for applications that require bulk Storage or where data is accessed infrequently. Premium storage accounts are backed by solid-state drives and offer consistent, low-latency performance. They can only be used with Azure virtual machine disks, and are best for I/O-intensive applications, like databases. Additionally, virtual machines that use Premium storage for all disks qualify for a 99.9% SLA, even when running outside of an availability set.
Note: – General-purpose v2 storage accounts support the latest Azure Storage features and incorporate all of the functionality of general-purpose v1 and Blob storage accounts
General-purpose v1 accounts provide access to all Azure Storage services, but may not have the latest features.
Hot Storage: – When we choose the Storage or the blob files as Hot, it means we want these files readily accessible.
Cold Storage: – We are talking about those files or Storage that are not accessed frequently.

After clicking on review + create button you will see review page with all option you have chosen will be displayed on this page.

Click on create button to create a storage account.
After creating an account below the screen, you will see.

Next, we are going get access keys for access blob storage which we have created.
Getting Access keys
To get Access keys just click on storage account name “demostoragedata” in the left side panel, you will see setting inside that you will get “Access keys” just click on it below screen will appear.

From this screen, we are going to copy the Connection string (key 1).
Adding Access Keys to appsettings.json file
Here we are going to add the connection string to appsettings.json with the key name “blobstorage“, and further we are going to past connection string which we have copied from Access keys screen.

appsettings.json file
{
  "Logging": {
    "LogLevel": {
      "Default": "Information",
      "Microsoft": "Warning",
      "Microsoft.Hosting.Lifetime": "Information"
    }
  },
  "AllowedHosts": "*",
  "blobstorage": "DefaultEndpointsProtocol=https;AccountName=demostoragedata;AccountKey=g9zw==;EndpointSuffix=core.windows.net"
}
After adding keys next, we are going to create a demo controller with the constructor in it.
Adding DemoController and injecting IConfiguration for accessing method
We are going to add a controller with name DemoController after adding we are going to add a constructor to it. For injecting IConfiguration dependency.
using Microsoft.AspNetCore.Mvc;
using Microsoft.Extensions.Configuration;

namespace WebBlobDemo.Controllers
{
    public class DemoController : Controller
    {
        private readonly IConfiguration _configuration;
        public DemoController(IConfiguration configuration)
        {
            _configuration = configuration;
        }
    }
}
After creating a controller and adding constructor of class for injecting dependency next, we are going to implement UploadFromByteArrayAsync method.
Implementing UploadFromByteArrayAsync method to upload file
For Implementing UploadFromByteArrayAsync, we are first going to create an action method with the name “Create” in the Demo controller class.
using Microsoft.AspNetCore.Mvc;
using Microsoft.Extensions.Configuration;

namespace WebBlobDemo.Controllers
{
    public class DemoController : Controller
    {
        private readonly IConfiguration _configuration;
        public DemoController(IConfiguration configuration)
        {
            _configuration = configuration;
        }

        [HttpGet]
        public IActionResult Create()
        {
            return View();
        }
   }
}
After adding create action method we are going to add Create View. This view will contain a file upload control along with submit button.
@{
    ViewData["Title"] = "Create";
}

<div class="row">
    <div class="col-md-6">
        <form method="post" enctype="multipart/form-data" asp-controller="Demo" asp-action="Create">
            <div class="form-group">
                <label> Select File </label>
                <input class="form-control" name="files" multiple="multiple" type="file" />
            </div>
            <div class="form-group">
                <input class="btn btn-success" type="submit" value="Submit" />
            </div>
        </form>
    </div>
</div>
Next step we are first going to create a container in azure storage account for doing that we have to download Azure Storage Explorer.
Download Azure Storage Explorer
URL to download:- https://azure.microsoft.com/en-us/features/storage-explorer/
Next, we are going to Connect to Azure Storage using “Azure Storage Explorer“.
Connect to Azure Storage
As you open azure storage explorer just click on connect plug a new dialog of “Connect to Azure Storage” will pop up in that we are going to choose ” Use a connection string ” option and click on next button.

After clicking on the next button below screen will popup where you need to paste connection string which you can copy from the azure storage account.

After clicking on next, it will show Connection Summary just click on connect button to connect to Azure storage account.
Next, we need to create a container to store images in it for that just right click on the storage account name and click on Create Blob Container and then enter the name “filescontainers“.


Next, we are going to add post method where we are going to UploadFromByteArrayAsync to upload bytes.
In Post method you see IFormFile interface as input which will get file details which are posted, then the first thing we are going to get is connection string (“blobstorage“) from appsettings.json file using Iconfiguration.
Next, we are going to Retrieve storage account from connection string after that we are going to create blob client, we are going to use cloudBlobClient to Retrieve a reference to a container.
Then to retrieve posted file information, we are going to use files.CopyTo and copy them to a memory stream and then finally we are going to get the byte array of it to pass UploadFromByteArrayAsync method.
[HttpPost]
public async Task<IActionResult> Create(IFormFile files)
{
    string blobstorageconnection = _configuration.GetValue<string>("blobstorage");

    byte[] dataFiles;
    // Retrieve storage account from connection string.
    CloudStorageAccount cloudStorageAccount = CloudStorageAccount.Parse(blobstorageconnection);
    // Create the blob client.
    CloudBlobClient cloudBlobClient = cloudStorageAccount.CreateCloudBlobClient();
    // Retrieve a reference to a container.
    CloudBlobContainer cloudBlobContainer = cloudBlobClient.GetContainerReference("filescontainers");

    BlobContainerPermissions permissions = new BlobContainerPermissions
    {
        PublicAccess = BlobContainerPublicAccessType.Blob
    };
    string systemFileName = files.FileName;
    await cloudBlobContainer.SetPermissionsAsync(permissions);
    await using (var target = new MemoryStream())
    {
        files.CopyTo(target);
        dataFiles = target.ToArray();
    }
    // This also does not make a service call; it only creates a local object.
    CloudBlockBlob cloudBlockBlob = cloudBlobContainer.GetBlockBlobReference(systemFileName);
    await cloudBlockBlob.UploadFromByteArrayAsync(dataFiles, 0, dataFiles.Length);

    return View();
}
Now let’s run application and upload file to Azure blob storage.

After selecting the file to upload, click on submit button to upload file to azure blob storage.

Next, we are going to use another method UploadFromStreamAsync to upload data to Azure Storage.
Implementing UploadFromStreamAsync method to upload file
In this method, we are going to upload a file using UploadFromStreamAsync method this method Initiates an asynchronous operation to upload a stream to a block blob. if the blob already exists, it will be overwritten.
public async Task<IActionResult> Create(IFormFile files)
 {
     string systemFileName = files.FileName;
     string blobstorageconnection = _configuration.GetValue<string>("blobstorage");
     // Retrieve storage account from connection string.
     CloudStorageAccount cloudStorageAccount = CloudStorageAccount.Parse(blobstorageconnection);
     // Create the blob client.
     CloudBlobClient blobClient = cloudStorageAccount.CreateCloudBlobClient();
     // Retrieve a reference to a container.
     CloudBlobContainer container = blobClient.GetContainerReference("filescontainers");
     // This also does not make a service call; it only creates a local object.
     CloudBlockBlob blockBlob = container.GetBlockBlobReference(systemFileName);
     await using (var data = files.OpenReadStream())
     {
         await blockBlob.UploadFromStreamAsync(data);
     }
     return View("Create");
 }
Now let’s run application and upload file to Azure blob storage.

After selecting the file click on submit to upload file to azure blob storage.

After uploading files to blob storage next, we are going get all files from blob storage.
See All Blob files
In this part, we are going get all blobs which we have uploaded to the Azure blob storage container.
For doing that we are going to create a Model with name FileData with 3 properties.
public class FileData
{
    public string FileName { get; set; }
    public string FileSize { get; set; }
    public string ModifiedOn { get; set; }
}
For getting all files, we are going to use ListBlobsSegmentedAsync method which Initiates an asynchronous operation to return a result segment containing a collection of blob items in the container.
After getting collection next, we are going to use for each loop for iterating objects which we get and then we are going to add them to List of FileData and sent it to View.
public async Task<IActionResult> ShowAllBlobs()
  {
      string blobstorageconnection = _configuration.GetValue<string>("blobstorage");
      CloudStorageAccount cloudStorageAccount = CloudStorageAccount.Parse(blobstorageconnection);
      // Create the blob client.
      CloudBlobClient blobClient = cloudStorageAccount.CreateCloudBlobClient();
      CloudBlobContainer container = blobClient.GetContainerReference("filescontainers");
      CloudBlobDirectory dirb = container.GetDirectoryReference("filescontainers");


      BlobResultSegment resultSegment = await container.ListBlobsSegmentedAsync(string.Empty,
          true, BlobListingDetails.Metadata, 100, null, null, null);
      List<FileData> fileList = new List<FileData>();

      foreach (var blobItem in resultSegment.Results)
      {
          // A flat listing operation returns only blobs, not virtual directories.
          var blob = (CloudBlob)blobItem;
          fileList.Add(new FileData()
          {
              FileName = blob.Name,
              FileSize = Math.Round((blob.Properties.Length / 1024f) / 1024f, 2).ToString(),
              ModifiedOn = DateTime.Parse(blob.Properties.LastModified.ToString()).ToLocalTime().ToString()
          });
      }

      return View(fileList);
  }
Next, we are going to View which will contain Download and delete button.
@model List<FileData>
@{
    ViewData["Title"] = "ShowAllBlobs";
}

<h1>ShowAllBlobs</h1>
<table class="table table-bordered">
    <thead>
    <tr>
        <th>FileName</th>
        <th>FileSize</th>
        <th>ModifiedOn</th>
        <th>Download</th>
        <th>Delete</th>
    </tr>
    </thead>
    <tbody>
    @foreach (var data in Model)
    {
        <tr>
            <td>@data.FileName</td>
            <td>@data.FileSize</td>
            <td>@data.ModifiedOn</td>
            <td> <a href="/Demo/Download?blobName=@data.FileName">Download</a> </td>
            <td> <a href="/Demo/Delete?blobName=@data.FileName">Delete</a> </td>
        </tr>
    }
    </tbody>
</table>
After adding View next, we are going to run application and access URL ‘/demo/ShowAllBlobs’ to see blobs which are stored in a blob container.

After adding View to see all blob stored in containers next, we are going to download files which are stored in a container for doing that we have already added download button in grid let’s add Action method to handle that request.
Download file from Azure Blob Storage
In this part, we are going to download a file which is stored in Azure blob storage container using DownloadToStreamAsync method. We have added download link on ‘ShowAllBlobs’ View Link which we are generating has blobName which we are going to pass to Download Action.
Using blobName, we are going to get blob from “filescontainers” container in stream form which we are going to pass it to FileStreamResult method.
<a href="/Demo/Download?blobName=@data.FileName">Download</a>public async Task<IActionResult> Download(string blobName)
{
CloudBlockBlob blockBlob;
await using (MemoryStream memoryStream = new MemoryStream())
{
string blobstorageconnection = _configuration.GetValue<string>("blobstorage");
CloudStorageAccount cloudStorageAccount = CloudStorageAccount.Parse(blobstorageconnection);
CloudBlobClient cloudBlobClient = cloudStorageAccount.CreateCloudBlobClient();
CloudBlobContainer cloudBlobContainer = cloudBlobClient.GetContainerReference("filescontainers");
blockBlob = cloudBlobContainer.GetBlockBlobReference(blobName);
await blockBlob.DownloadToStreamAsync(memoryStream);
}
Stream blobStream = blockBlob.OpenReadAsync().Result;
return File(blobStream, blockBlob.Properties.ContentType, blockBlob.Name);
}Now let’s run application and test download feature by click on the download button.

Next, we are going to delete the file from azure blob storage.
Delete file from Azure Blob Storage
In this part, we are going to delete a file which is stored in Azure blob storage container using DeleteIfExistsAsync method. We have added delete link on ‘ShowAllBlobs’ View Link which we are generating has blobName which we are going to pass to Delete Action.
Using blobName we are going to Delete blob from filescontainers container.
<a href="/Demo/Delete?blobName=@data.FileName">Delete</a>public async Task<IActionResult> Delete(string blobName)
{
string blobstorageconnection = _configuration.GetValue<string>("blobstorage");
CloudStorageAccount cloudStorageAccount = CloudStorageAccount.Parse(blobstorageconnection);
CloudBlobClient cloudBlobClient = cloudStorageAccount.CreateCloudBlobClient();
string strContainerName = "filescontainers";
CloudBlobContainer cloudBlobContainer = cloudBlobClient.GetContainerReference(strContainerName);
var blob = cloudBlobContainer.GetBlobReference(blobName);
await blob.DeleteIfExistsAsync();
return RedirectToAction("ShowAllBlobs", "Demo");
}
Let’s Deleted donaldduck.png File from Azure blob storage.

In this article, we have learned how to use Azure Blob Storage using ASP.NET Core in simple steps hope you have like it please share it let others learn from it.
Read more :- https://tutexchange.com/how-to-set-up-automapper-in-asp-net-core-3-0/
Hi saineshwarbageri,
I Tired Uploading a file to blob storage its working fine but when trying to upload a multiple files its only uploading a Single File to blob storage can you help me with the multiple files upload and thanks for the efforts your example was really helpful for me