In this article, we are going to learn how to Crop and Resize Image and store in a folder in a step by step way.
Every application we develop now days has the option to set a profile photo right. Some application has a clause of fix length and Size of profile photo where the user needs to upload an image of fix length and Size which cause issues.
In this part we are going allow users to upload a photo then adjust the zoom of the picture as they need then we are going resize Image in different format and store in a folder.
- 200 * 200 Passport size
- 180 * 180 Facebook size
- 32 * 32 Icon size

Packages Used
ImageSharp
ImageSharp is a new, fully-featured, fully managed, cross-platform, 2D graphics library. Designed to simplify image processing, ImageSharp brings you an incredibly powerful yet beautifully simple API.
Croppie
Croppie is a fast, easy to use image cropping plugin with tons of configuration options
Table of Contents
- Getting Started with Upload Crop Resize Image in ASP.NET Core
- Project structure
- Installing SixLabors.ImageSharp Extension from NuGet Package
- Adding Controller and View
- Adding CustomCrop View
- Adding jQuery and Croppie CDN Reference on View
- Initialize Croppie and read file Content
- Adding CustomCrop Post Action Method
- Ajax Request for Posting Cropped Image
- Upload and Cropped Image
- Output
Getting Started with Upload Crop Resize Image in ASP.NET Core
We are going to create a new application with Name WebCropper for demo as shown below.

Next, we are going to set Project Name WebCropper and location. In last part, we are going to choose .Net Core framework and ASP.NET Core Version 3.1 as the framework for application and few advance settings for such as configuring https and enabling docker we are not going to enable docker settings for this project.
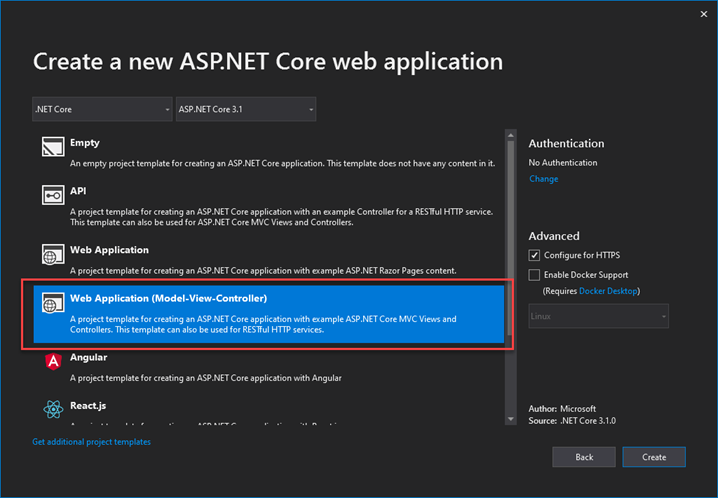
Now finally click on create button to create a project.
Project structure
The project structure generated according to the configuration.

After creating project next, we are going to install SixLabors.ImageSharp Extension from NuGet Package.
Installing SixLabors.ImageSharp Extension from NuGet Package

After installing next, we are going to add Controller and View where we will allow uses to upload and crop photo.
Adding Controller and View
Let’s Add Controller with name Demo Controller and Action Method with Name CustomCrop.
using System;
using System.Collections.Generic;
using System.Linq;
using System.Threading.Tasks;
using Microsoft.AspNetCore.Mvc;

namespace WebCropper.Controllers
{
    public class DemoController : Controller
    {
        public IActionResult CustomCrop()
        {
            return View();
        }
    }
}
Next after adding Controller and Action Method next, we are going to add View with Name CustomCrop.
On this View, we are going to add input of type file to upload Image.
Adding CustomCrop View
@{
    Layout = null;
}

<!DOCTYPE html>
<html>
<head>
    <meta name="viewport" content="width=device-width" />
    <title>CustomCrop</title>
    <link href="~/lib/bootstrap/dist/css/bootstrap.css" rel="stylesheet" />
</head>
<body>
    <div class="container">
        <div class="d-flex justify-content-center">
            <div class="col-md-6">

                <div class="card" style="margin-top:10px;">
                    <div class="card-header">Cropper in ASP.NET Core</div>
                    <div class="card-body">
                        <div id="main-cropper"></div>
                        <input type="file" id="select" class="form-control" value="Choose Image" accept="image/*">
                        <button id="btnupload" style="margin-top: 10px;" name="btnupload" class="btn btn-success">Crop</button>
                    </div>
                </div>
            </div>
        </div>
    </div>
</body>
</html>
Next, after adding View next, we are going to add reference of image cropping plugin.
What is Croppie?
Croppie is a fast, easy to use image cropping plugin with tons of configuration options!
https://foliotek.github.io/Croppie/
Adding jQuery and Croppie CDN Reference on View
<head>
  <meta name="viewport" content="width=device-width" />
  <title>CustomCrop</title>
  <link href="~/lib/bootstrap/dist/css/bootstrap.css" rel="stylesheet" />
  <script src="~/lib/jquery/dist/jquery.js"></script>
  <link rel="stylesheet" href="https://cdnjs.cloudflare.com/ajax/libs/croppie/2.6.5/croppie.min.css" />
  <script src="https://cdnjs.cloudflare.com/ajax/libs/croppie/2.6.5/croppie.min.js"></script>
  <style>
        .croppie-container {
            width: 100%;
            height: 80%;
        }
   </style>
</head>
Next, we are going to Initialize croppie.
Initialize Croppie and read file Content
<script type="text/javascript">

    //initialize Croppie
    var basic = $('#main-cropper').croppie
    ({
        viewport: { width: 300, height: 300 },
        boundary: { width: 500, height: 400 },
        showZoomer: true,
        url: '/DefaultImages/preview.jpg',
        format:'png' //'jpeg'|'png'|'webp'
    });

    //Reading the contents of the specified Blob or File
    function readFile(input) {
        if (input.files && input.files[0])
        {
            var reader = new FileReader();

            reader.onload = function (e) {
                $('#main-cropper').croppie('bind', {
                    url: e.target.result
                });
            }
            reader.readAsDataURL(input.files[0]);
        }
    }

   // Change Event to Read file content from File input
    $('#select').on('change', function () { readFile(this); });

</script>
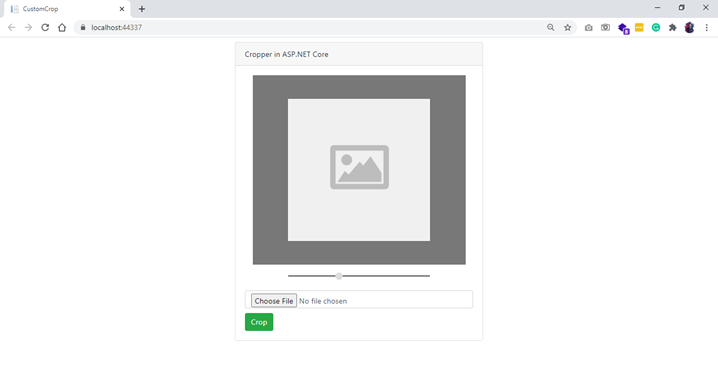
After initializing Croppie next, we are going to run the application to see Created UI.
After we have created UI next let’s create an Action method for handling Ajax POST request.
Adding CustomCrop Post Action Method
In this part, we are going create action method which is going to handle ajax POST request where we are going receive Cropped file.
Reading Stream of Cropped file we are going pass it to ImageSharp Load Method which will return image object on image object we can apply an operation on Image resize a then store in a folder.
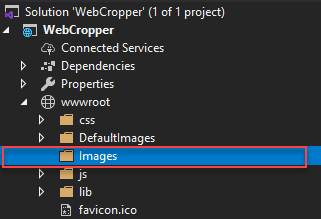
We are going to store Image in a folder for that we are going to create a folder in wwwroot with Name Images.
We are going to resize Image in 3 different sizes 200, 180, 32.
[HttpPost]
        public IActionResult CustomCrop(string filename, IFormFile blob)
        {
            try
            {
                using (var image = Image.Load(blob.OpenReadStream()))
                {
                    string systemFileExtenstion = filename.Substring(filename.LastIndexOf('.'));

                    image.Mutate(x => x.Resize(180, 180));
                    var newfileName180 = GenerateFileName("Photo_180_180_", systemFileExtenstion);
                    var filepath160 = new PhysicalFileProvider(Path.Combine(Directory.GetCurrentDirectory(), "wwwroot", "Images")).Root + $@"\{newfileName180}";
                    image.Save(filepath160);

                    var newfileName200 = GenerateFileName("Photo_200_200_", systemFileExtenstion);
                    var filepath200 = new PhysicalFileProvider(Path.Combine(Directory.GetCurrentDirectory(), "wwwroot", "Images")).Root + $@"\{newfileName200}";
                    image.Mutate(x => x.Resize(200, 200));
                    image.Save(filepath200);

                    var newfileName32 = GenerateFileName("Photo_32_32_", systemFileExtenstion);
                    var filepath32 = new PhysicalFileProvider(Path.Combine(Directory.GetCurrentDirectory(), "wwwroot", "Images")).Root + $@"\{newfileName32}";
                    image.Mutate(x => x.Resize(32, 32));
                    image.Save(filepath32);

                }

                return Json(new { Message = "OK" });
            }
            catch (Exception)
            {
                return Json(new { Message = "ERROR" });
            }
        }
To generate Unique file name, we have created the below method.
   public string GenerateFileName(string fileTypeName, string fileextenstion)
 {
     if (fileTypeName == null) throw new ArgumentNullException(nameof(fileTypeName));
     if (fileextenstion == null) throw new ArgumentNullException(nameof(fileextenstion));
     return $"{fileTypeName}_{DateTime.Now:yyyyMMddHHmmssfff}_{Guid.NewGuid():N}{fileextenstion}";
 }
After adding CustomCrop action method next, we are going to write XMLHttpRequest request to post filename and file to CustomCrop method.
Ajax Request for Posting Cropped Image
  // Upload button to Post Cropped Image to Store.
    $('#btnupload').on('click', function ()
    {
        basic.croppie('result', 'blob').then(function (blob)
        {
            var formData = new FormData();

            formData.append('filename', 'FileName.png');
            formData.append('blob', blob);
            var myAppUrlSettings =
            {
                MyUsefulUrl: '@Url.Action("CustomCrop", "Demo")'
            }
            var request = new XMLHttpRequest();
            request.open('POST', myAppUrlSettings.MyUsefulUrl);
            request.send(formData);
            request.onreadystatechange = function () {
               // Call a function when the state changes.
                if (this.readyState === XMLHttpRequest.DONE && this.status === 200)
                {
                    var response = JSON.parse(request.responseText);

                    if (response.message == "OK")
                    {
                        alert('Photo Cropped Successfully!');
                        window.location.reload();
                    }
                    if (response.message == "ERROR")
                    {
                        window.location.reload();
                    }
                }
            }
        });
    });
After adding code for posting cropped images next, let’s run application and test.
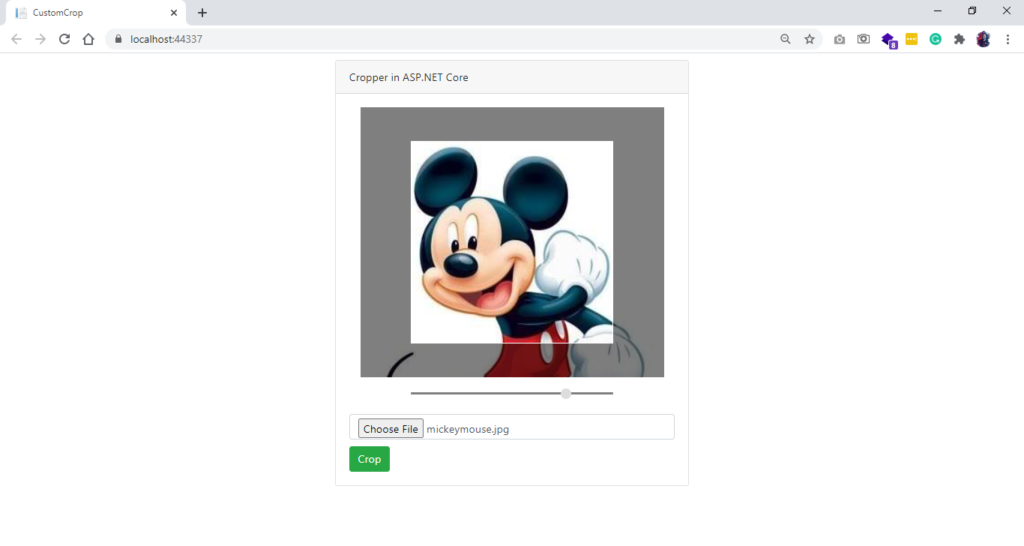
Upload and Cropped Image
In this part just upload Image and adjust Image and click on crop button to crop Image.

After cropping, images will be stored in the folder, as shown below.
Output
