

In this article, we will learn how to integrate MongoDB with .Net Aspire. As you know, .Net Aspire is used to build cloud-native applications.


What is MongoDB?
MongoDB is a popular, open-source, NoSQL database management system designed to handle large amounts of unstructured or semi-structured data.
Unlike traditional relational databases that use tables and rows to store data, MongoDB uses a flexible, document-oriented approach where data is stored in BSON (Binary JSON) format. This allows for more dynamic and scalable data storage.
If you are working on .NET applications and looking to integrate with PostgreSQL and Redis, here are two useful resources that can help you get started:
- How to Integrate .NET Aspire with PostgreSQL
This article provides a step-by-step guide to help you seamlessly integrate your .NET applications with PostgreSQL. It covers the key concepts, configuration steps, and sample code to ensure a smooth connection between .NET Aspire and PostgreSQL. - How to Integrate .NET Aspire with Redis
Redis is widely used for caching and message brokering. This guide walks you through integrating Redis with your .NET applications. It explains how to configure Redis, establish a connection, and leverage it effectively for enhanced performance in your .NET projects.
In this article, we cover:
- Create a .Net Aspire Starter App.
- Solution Explorer
- Hosting integration
- Adding MongoDB to App Host Project
- View after Adding Aspire.Hosting.MongoDB NuGet packages to the project.
- Adding MongoDB Resource
- Code Snippet of AspireApp6.AppHost Program.cs file
- Adding Data Volume
- Adding With WithLifetime
- Adding WithDataBindMount
- Adding MongoDB Express Admin User Interface
- Client integration
- Installing Aspire.MongoDB.Driver NuGet package.
- Adding Swashbuckle.AspNetCore.SwaggerGen NuGet package.
- Adding Swashbuckle.AspNetCore.SwaggerUI NuGet package.
- After adding the All NuGet package to the Project.
- Adding Mongo Client in API Service Project
- Adding Model to API Service Project.
- Adding Model to API Service Project.
- Added ProductRequest Model for taking Input
- Adding API Controller
- Added an Empty API Controller to the Project
- Code Snippet of ProductController
- Adding Services to Program.cs class of API Service
- Aspire Dashboard
- Docker container View
- Mongo Express
- API Service Endpoint
- Swagger View
- Call API Service for inserting data
- Project Debug View while Inserting
- Mongo Express Dashboard
- Call API Service to get all Products
- Conclusion
Create a .Net Aspire Starter App.


After selecting the project, click the “Next” button to proceed.
A new dialogue will appear, prompting you to configure your latest project. Within this dialogue, you will be asked to provide a Solution Name and specify where the project should be saved.


After entering details, click the “Next” button to proceed.
A new dialogue will appear, prompting you to configure additional information related to the project, such as the framework, the .NET Aspire version, and the option to create a test project. For this demonstration, I will select .NET Aspire 9.0.

Click on the Create button to create a project.
Solution Explorer


We have created a solution, so let’s begin by adding MongoDB to the project.
Hosting integration
Adding MongoDB to App Host Project
In the App Host Project, we are going to Install the package Aspire.Hosting.MongoDB.


View after Adding Aspire.Hosting.MongoDB NuGet packages to the project.


After installation, we need to add resources to the Program.cs class of AppHost project.
Adding MongoDB Resource
- Adding MongoDB Service in Program.cs file.
- Adds a MongoDB resource to the application model. A container is used for local development.
- WithDataVolume Ensures that the database has a persistent data volume for storing data.
- Add reference to API service.
- ProductDatabase will be the Database Name
Code Snippet of AspireApp6.AppHost Program.cs file
var builder = DistributedApplication.CreateBuilder(args);

var cache = builder.AddRedis("cache");

var mongo = builder.AddMongoDB("mongo")
    .WithLifetime(ContainerLifetime.Persistent);

var mongodb = mongo.AddDatabase("mongodb","ProductDatabase");

var apiService =
     builder.AddProject<Projects.AspireApp6_ApiService>("apiservice")
    .WithReference(mongodb)
    .WaitFor(mongodb);

builder.AddProject<Projects.AspireApp6_Web>("webfrontend")
    .WithExternalHttpEndpoints()
    .WithReference(cache)
    .WaitFor(cache)
    .WithReference(apiService)
    .WaitFor(apiService);

builder.Build().Run();
Adding Data Volume
To add a data volume to the MongoDB server resource, call the WithDataVolume method on the MongoDB server.
The data volume stores MongoDB server data outside the container’s lifecycle. It is mounted at /data/db in the container, and if no name is provided, a random name is generated.
var builder = DistributedApplication.CreateBuilder(args);

var cache = builder.AddRedis("cache");

var mongo = builder.AddMongoDB("mongo")
    .WithDataVolume();
var mongodb = mongo.AddDatabase("mongodb","ProductDatabase");

var apiService =
     builder.AddProject<Projects.AspireApp6_ApiService>("apiservice")
    .WithReference(mongodb)
    .WaitFor(mongodb);
Adding With WithLifetime
In your app host project, use AddMongoDB to add a MongoDB server resource builder. Then, chain AddDatabase to add a MongoDB database resource.
AddMongoDB(“mongo”): Adds a MongoDB service with the name “mongo”.
.WithLifetime(ContainerLifetime.Persistent): Ensures the MongoDB service has a persistent lifetime, meaning it will persist beyond the container’s lifecycle.
var builder = DistributedApplication.CreateBuilder(args);

var cache = builder.AddRedis("cache");

var mongo = builder.AddMongoDB("mongo")
    .WithLifetime(ContainerLifetime.Persistent);

var mongodb = mongo.AddDatabase("mongodb","ProductDatabase");
Adding WithDataBindMount
Use the WithInitBindMount method to add an initialization folder data bind mount to the MongoDB server resource.
var builder = DistributedApplication.CreateBuilder(args);

var cache = builder.AddRedis("cache");

var mongo = builder.AddMongoDB("mongo")
    .WithInitBindMount(@"C:\MongoDB\Init");

var mongodb = mongo.AddDatabase("mongodb");
The initialization data bind mount sets up the MongoDB server with data. It is located at C:\MongoDB\Init on Windows or /MongoDB/Init on Unix and maps to /docker-entrypoint-initdb.d in the MongoDB container. MongoDB runs scripts from this folder to load data into the database.
Adding MongoDB Express Admin User Interface
MongoDB Express is a web-based user interface for managing MongoDB.
To use it we need to add WithMongoExpress(); to the AddMongDB extension.
var builder = DistributedApplication.CreateBuilder(args);

var cache = builder.AddRedis("cache");

var mongo = builder.AddMongoDB("mongo")
    .WithMongoExpress();

var mongodb = mongo.AddDatabase("mongodb");
Till now we have configured the AspireApp6.AppHost project. Now let us do client integration.
Client integration
Client integration means the project which is going to consume MongoDB.
In this Demo, API Services will be the client because we are going to consume MongoDB and perform operations in it.
To start using the .NET Aspire MongoDB client, install the Aspire.MongoDB.Driver NuGet package in the project that uses the MongoDB client. The integration registers an IMongoClient to interact with the MongoDB server. If your app adds MongoDB databases, it also registers an IMongoDatabase instance.
Installing Aspire.MongoDB.Driver NuGet package.


Next, we will integrate Swagger into this project to enhance our API documentation.
Adding Swashbuckle.AspNetCore.SwaggerGen NuGet package.


Adding Swashbuckle.AspNetCore.SwaggerUI NuGet package.
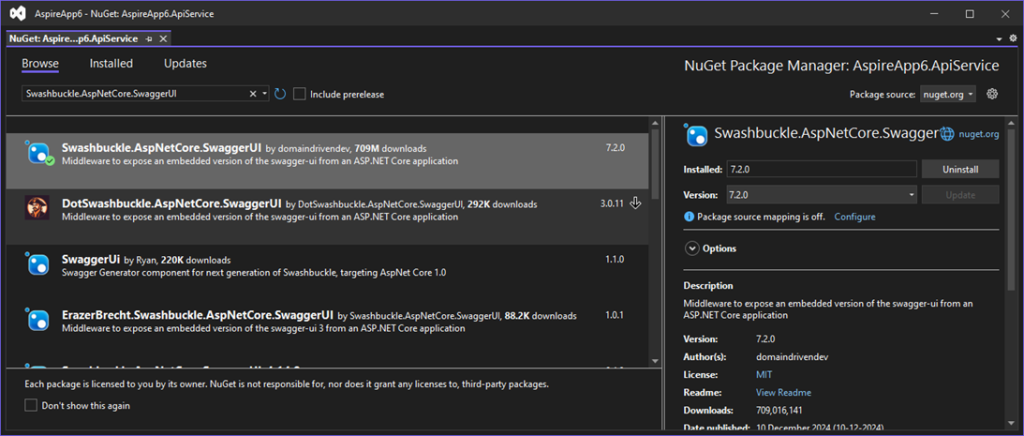
After adding the All NuGet package to the Project.


Adding Mongo Client in API Service Project
In this part, we are going to register Mongo Client in the API service project because in this project we are going to consume hosted MongoDB.
Configures a MongoDB client as part of the application’s dependency injection (DI) system.
Registers the MongoDB client so it can be injected into services or controllers that need database access.
var builder = WebApplication.CreateBuilder(args);

// Add service defaults & Aspire client integrations.
builder.AddServiceDefaults();
builder.AddMongoDBClient(connectionName: "mongodb");

// Add services to the container.
builder.Services.AddProblemDetails();

var app = builder.Build();

// Configure the HTTP request pipeline.
app.UseExceptionHandler();

app.MapDefaultEndpoints();

app.Run();
Now to Use MongoDB Instance in the Application we need to Inject IMongoClient in the Controller or Class where you want to use it.
Adding Model to API Service Project.
We are going to Add the Product Model in the Models folder which we have added in ApiService Project.


Added Product Model
using MongoDB.Bson.Serialization.Attributes;
using MongoDB.Bson;

namespace AspireApp6.ApiService.Models;

public class Product
{
    [BsonId] // Indicates this property maps to MongoDB's _id field.
    [BsonRepresentation(BsonType.ObjectId)] // Ensures it can handle ObjectId type.
    public string Id { get; set; }
    public int ProductId { get; set; }
    public string Name { get; set; }
    public string Description { get; set; }
    public decimal Price { get; set; }
    public int Quantity { get; set; }
    public int? CategoryID { get; set; }
    public string ImageUrl { get; set; }
    public DateTime CreatedAt { get; set; }
    public DateTime UpdatedAt { get; set; }
}
Added ProductRequest Model for taking Input
namespace AspireApp6.ApiService.Models;

public class ProductRequest
{
    public int ProductId { get; set; }
    public string Name { get; set; }
    public string Description { get; set; }
    public decimal Price { get; set; }
    public int Quantity { get; set; }
    public int? CategoryID { get; set; }
    public string ImageUrl { get; set; }
}
After Adding the Model next we are going to API Controller for Inserting and deleting Data.
Adding API Controller


After Adding ProductController to the project.


Added an Empty API Controller to the Project
using Microsoft.AspNetCore.Http;
using Microsoft.AspNetCore.Mvc;

namespace AspireApp6.ApiService
{
    [Route("api/[controller]")]
    [ApiController]
    public class ProductController : ControllerBase
    {
    }
}
After adding the API controller, the next step is to implement methods for inserting data into the MongoDB Database and retrieving values from it.
To achieve this, we will use constructor injection to obtain an instance of the IMongoClient.
Adding 2 Methods
- GetProduct Method
- AddProduct Method
GetProduct Method
The GetProduct method retrieves all products stored in the MongoDB products collection.
It uses an empty filter to fetch all documents and converts the result into a list using ToListAsync.
The method then returns the list of products as an HTTP 200 OK response.
AddProduct Method
The AddProduct method is designed to add a new product to the database. Currently,
it creates a hardcoded Product object with predefined values such as name, description, price, and other details.
This product is inserted into the products collection using the InsertOneAsync method, and the method returns true upon successful insertion.
Note that the passed product parameter from the request body is not being used, which may require adjustment for dynamic input handling.
Code Snippet of ProductController
using AspireApp6.ApiService.Models;
using Microsoft.AspNetCore.Http;
using Microsoft.AspNetCore.Mvc;
using MongoDB.Driver;

namespace AspireApp6.ApiService
{
    [Route("api/[controller]")]
    [ApiController]
    public class ProductController : ControllerBase
    {
        private readonly IMongoCollection<Product> _productCollection;
        /// <summary>
        ///
        /// </summary>
        /// <param name="iMongoClient"></param>
        public ProductController(IMongoClient iMongoClient)
        {
            var database = iMongoClient.GetDatabase("ProductDatabase");
            _productCollection = database.GetCollection<Product>("products");
        }

        [HttpGet]
        public async Task<IActionResult> GetProduct()
        {
            var listofProducts = await _productCollection.Find(FilterDefinition<Product>.Empty).ToListAsync();
            return Ok(listofProducts);
        }

        [HttpPost]
        public async Task<bool> AddProduct([FromBody] ProductRequest product)
        {
            try
            {

                var newProduct = new Product
                {
                    Name = product.Name,
                    ProductId = product.ProductId,
                    CreatedAt = DateTime.Now,
                    Description = product.Description,
                    Price = product.Price,
                    Quantity = product.Quantity,
                    CategoryID = product.Quantity,
                    ImageUrl = product.ImageUrl
                };
                await _productCollection.InsertOneAsync(newProduct);

            }
            catch (Exception e)
            {
                throw;
            }
            return true;
        }
    }
}
After Adding the Controller next we are going to register the Service in the Program.cs class.
Adding Services to Program.cs class of API Service
var builder = WebApplication.CreateBuilder(args);

// Add service defaults & Aspire client integrations.
builder.AddServiceDefaults();

// Add API Documentation
builder.Services.AddSwaggerGen();

// Add controllers services
builder.Services.AddControllers();

// Add MongoDB client
builder.AddMongoDBClient(connectionName: "mongodb");

// Add services to the container.
builder.Services.AddProblemDetails();

var app = builder.Build();

// Configure the HTTP request pipeline.
app.UseExceptionHandler();

// map controllers to endpoints
app.MapControllers();
// Add API Documentation
app.UseSwagger();
// Add API Documentation
app.UseSwaggerUI();

app.MapDefaultEndpoints();

app.Run();
After completing the integration with the API Service, we can now run the application for the first time.
This is the Dashboard for Aspire project where you will see all applications which are running.
Aspire Dashboard


The application runs in the docker container.
Docker container View


As we saw Aspire Dashboard and Docker Container next let’s see what is Mongo Express.
Mongo Express
Mongo Express is a web-based administrative interface for managing MongoDB databases. It is a lightweight tool built with Node.js and Express, providing a graphical user interface to interact with MongoDB, similar to how phpMyAdmin works with MySQL. Developers often use it for quick database management and testing in development environments.

To see Mongo Express UI let’s click on Endpoint.
After clicking on mongo-express Endpoint you will see Mongo Express Dashboard with all databases.
We are not able to see our database in it right?


API Service Endpoint
From Dashboard let’s click on Api service to see swagger documentation.

After clicking on the URL it does not open.


To access documentation, we need to append /swagger to the URL.
https://localhost:7339/swagger/index.html
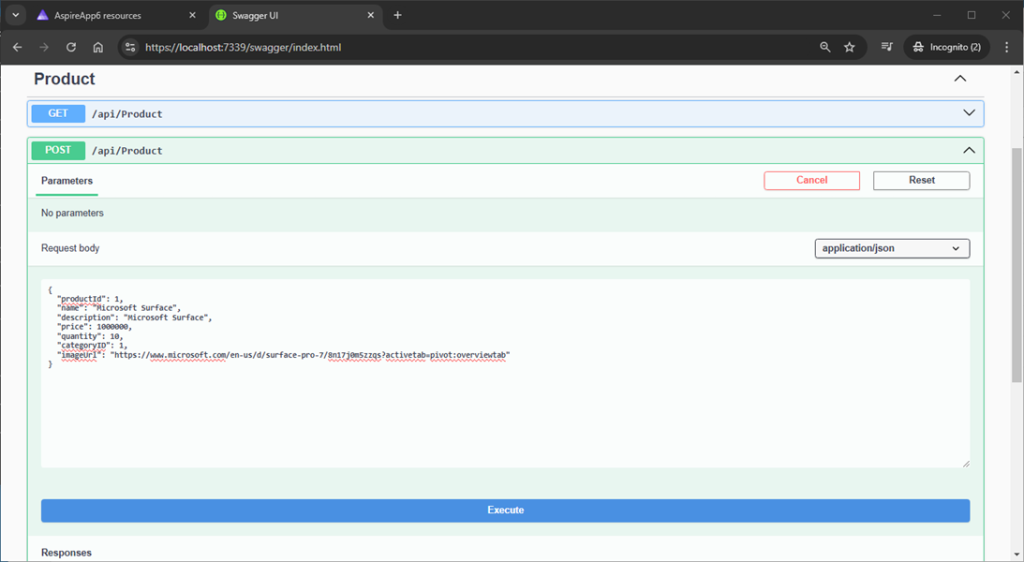
Swagger View

Call API Service for inserting data

Project Debug View while Inserting


After Calling API and inserting data into MongoDB Database let’s view Mongo Express UI for data for crossing checking is data inserted into it.
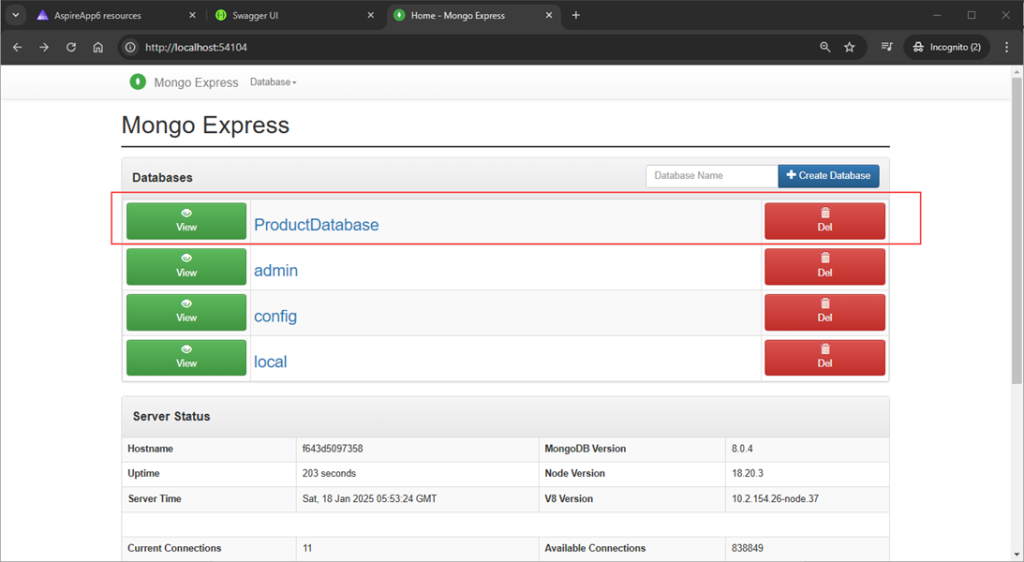
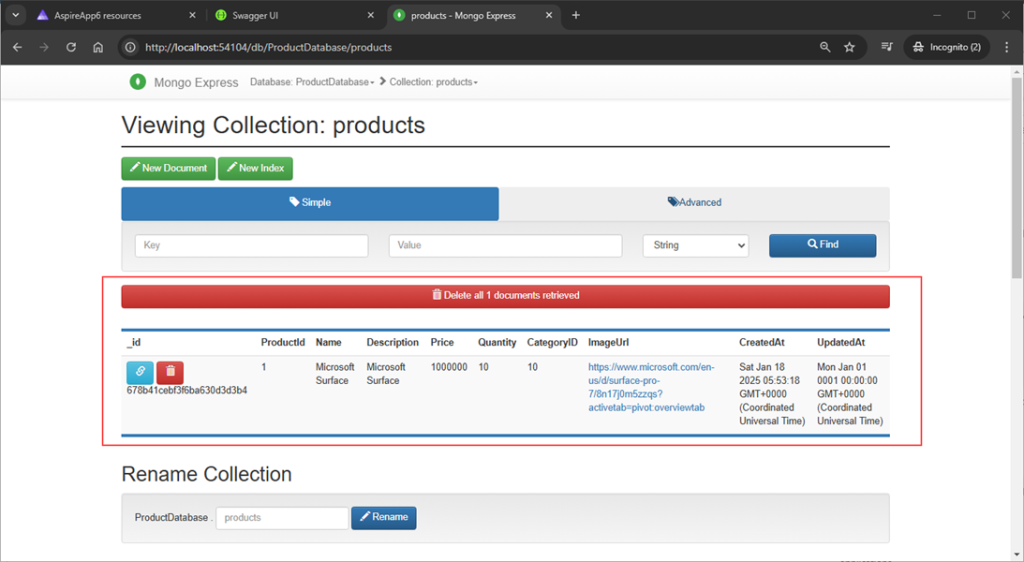
Mongo Express Dashboard
As we open the Database, we see Database Is Created after inserting data into the products Collection.
Let’s click on ProductDatabase to view the Inserted data.
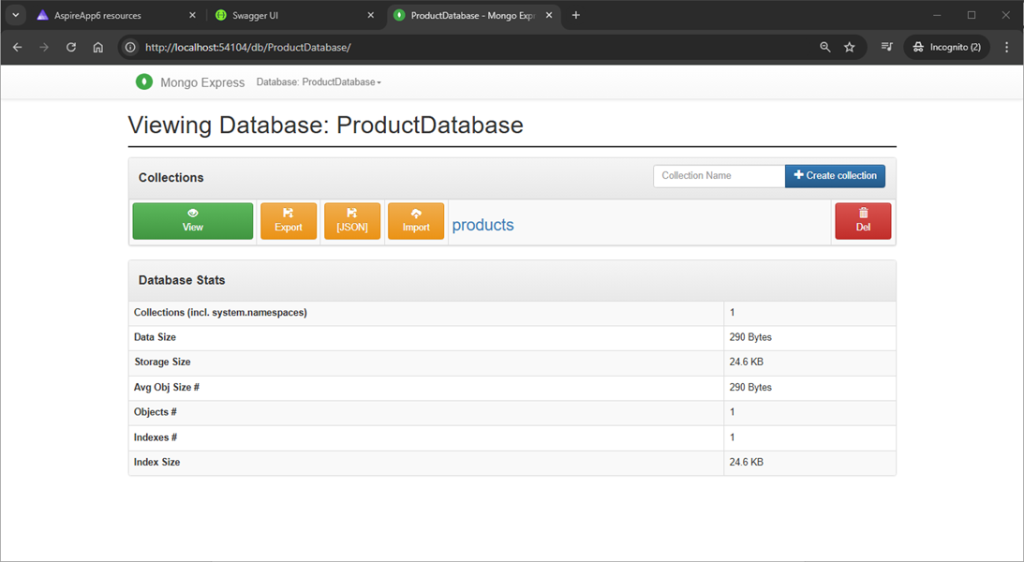
To View the collection, we need to click on ProductDatabase. Then you can view the products collection.
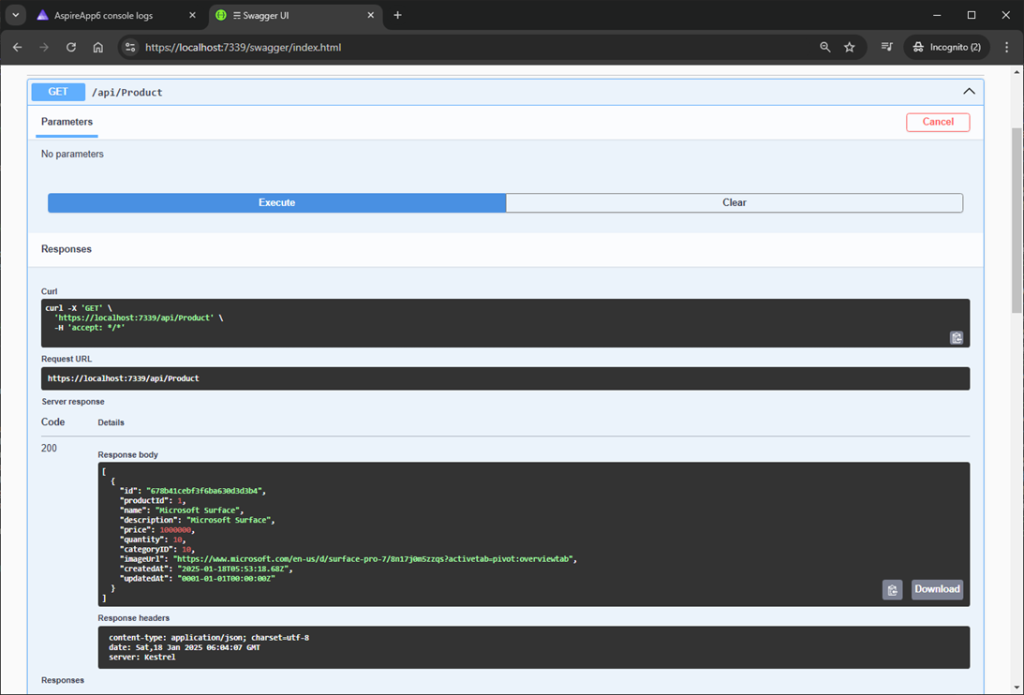
Call API Service to get all Products
Call Get Products will show all products which are added to the products collection in MongoDB.

Conclusion
I hope you have liked the article. In this article, you have learned how to create an Aspire project and configure the MongoDB database for Inserting and reading data from it.
Referenced From: Microsoft Learn – ASP.NET Core Inspire Series
GitHub Link :- https://github.com/saineshwar/Aspire_MongoDB