In this article, we will learn how to integrate with .NET Aspire to build cloud-native applications using Azure Cosmos DB. .NET Aspire Azure Cosmos DB Integration enables developers to leverage the power of Azure’s fully managed, globally distributed database service for high availability, scalability, and low-latency data access.
In this article, we cover:
- Key Features of Azure Cosmos DB
- Create a .Net Aspire Starter App.
- Solution Explorer
- Create a New Azure Cosmos DB Account
- Get Cosmos DB Connection String
- Create a Database and Container
- View after Creating Container
- Configuring Host Project
- Adding NuGet Package
- Adding Connection String to appsettings.json
- Added connection string to appsettings.json file
- Adding changes to the Program.cs
- Client Project (AspireAzureCosmosDB.ApiService)
- Solution View after adding the package.
- Adding Model
- MusicItem Model
- Music Model
- Adding CosmosService Class
- Source Code of Cosmos Service
- Registering service in Program.cs class
- Adding APIController
- Source Code of DemoController
- Call API Service for Inserting Data into Cosmos DB.
- Inserting Data using API
- Inserted Data into Azure Cosmos DB
- Get All Music Stored Items
- Get Music Id
- Delete Music
- View After deleting the Record.
Azure Cosmos DB is a fully managed, globally distributed, multi-model database service provided by Microsoft Azure. It’s designed for high availability, scalability, and low-latency data access.
Key Features of Azure Cosmos DB:
- Multi-Model Support: Supports various data models including document, key-value, graph, and column-family. Common APIs include:
- Core (SQL) API for JSON documents
- MongoDB API for document databases
- Cassandra API for wide-column stores
- Gremlin API for graph databases
- Table API for key-value storage
- Global Distribution: Automatically replicates data across multiple Azure regions, enabling users to read and write data from the nearest region.
- Elastic Scalability: Provides automatic and instant scaling of throughput and storage based on workload.
- Guaranteed Performance: Offers single-digit millisecond read and write latencies and 99.999% availability SLA for multi-region deployments.
- Consistency Levels: Supports five consistency models—Strong, Bounded Staleness, Session, Consistent Prefix, and Eventual—allowing you to balance consistency and performance.
- Serverless and Provisioned Throughput: Offers serverless and provisioned throughput modes to handle varying workloads efficiently.
Create a .Net Aspire Starter App.

After selecting the project, click the “Next” button to proceed.
A new dialogue will appear, prompting you to configure your new project. Within this dialogue, you will be asked to provide a Solution Name and specify the location where the project should be saved. The solution name I am going to enter is AspireAzureCosmosDB for the demo.

After entering details, click the “Next” button to proceed.
A new dialogue will appear, prompting you to configure additional information related to the project, such as the framework, the .NET Aspire version, and the option to create a test project. For this demonstration, I will select .NET Aspire 9.0.

Click on the Create button to create a project.
Solution Explorer

We have created a solution, so let’s begin by Creating an Azure Cosmos DB account.
Create a New Azure Cosmos DB Account
- In the Azure Portal, click on Create a resource.
- Search for Azure Cosmos DB and select it.

After clicking on Create button next option is to Select the API to create a new account.
The API selection cannot be changed after account creation.
We have 2 options.
- Azure Cosmos DB for NoSQL
- Azure Cosmos DB for MongoDB
For the demo, I have selected “Azure Cosmos DB for NoSQL”
Azure Cosmos DB for NoSQL Azure Cosmos DB’s core, or native API for working with documents. Supports fast, flexible development with familiar SQL query language and client libraries for .NET, JavaScript, Python, and Java.

After selecting “Azure Cosmos DB for NoSQL” you need to enter Project Details and Instance Details also need to select the right Subscription.
For the demo, I have named it as cosmosdbmumbai

After entering details click on the Review + create button. A new view will appear.
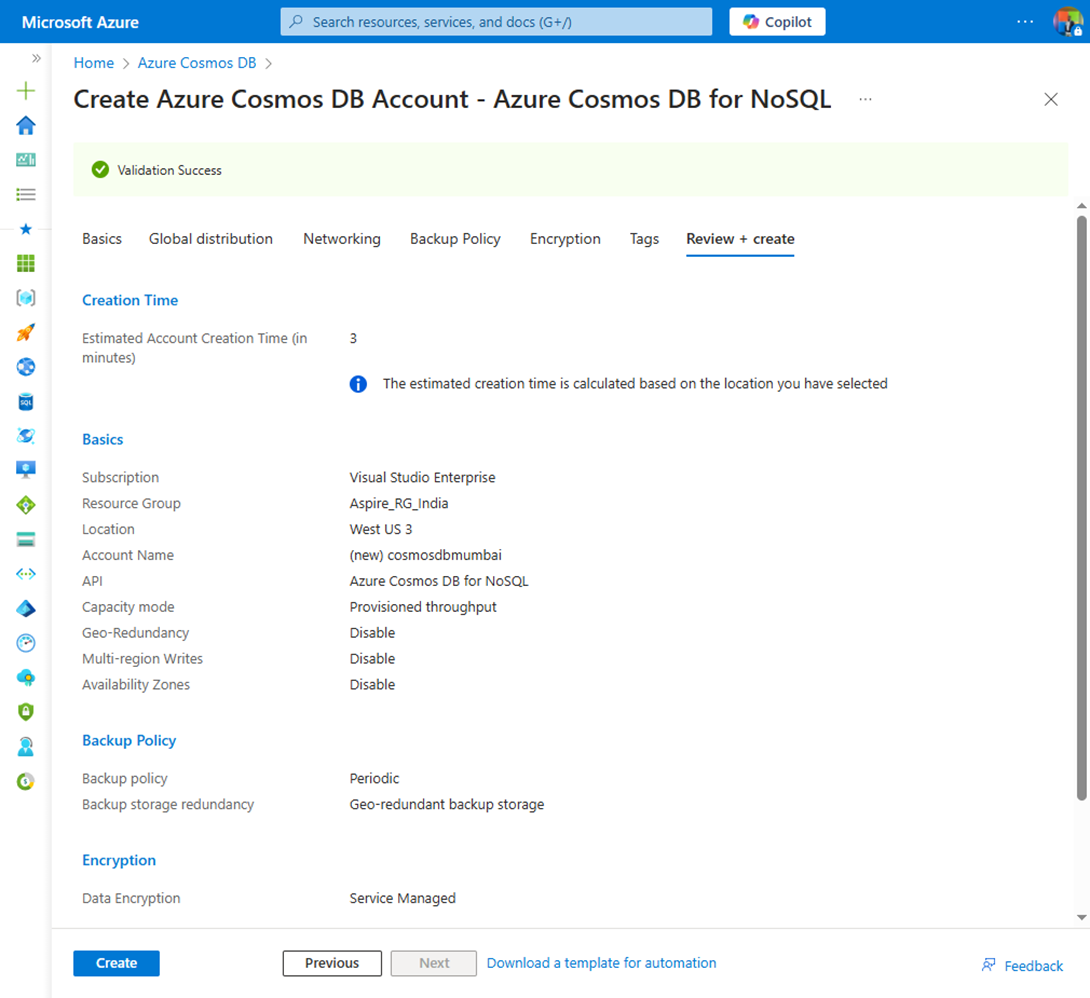
After confirming your settings, click the create button.

Click on the Azure Cosmos DB Menu to see the created resource.
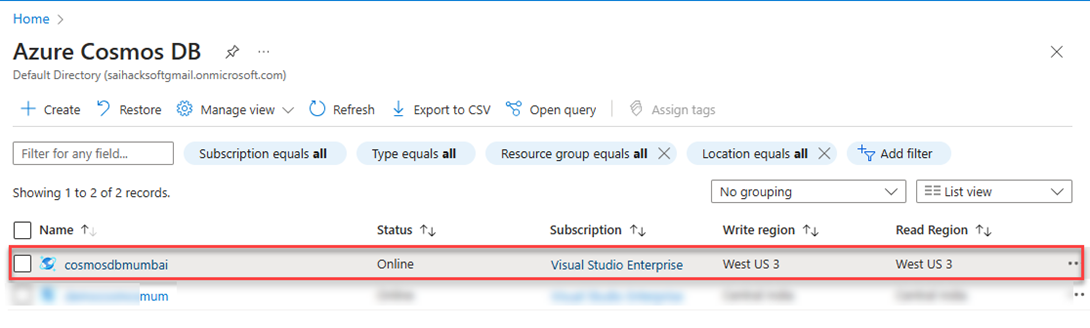
Click on cosmosdbmumbai to view details and Connection String to Connect. To view the Connection string click on Keys under settings then you will see the Primary and Secondary Connection string.
Get Cosmos DB Connection String
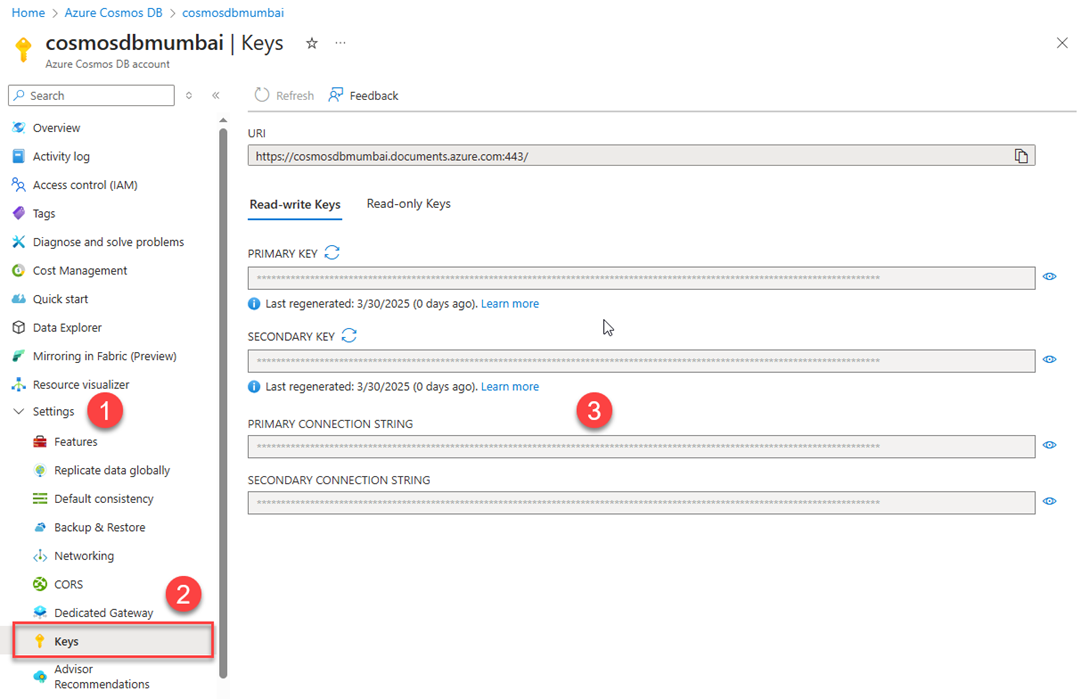
Primary Connection String
- Purpose: It’s the main connection string used to read and write data.
- Read/Write Access: Supports both read and write operations.
Secondary Connection String
- Purpose: It’s a backup connection string for redundancy.
- Read/Write Access: By default, it also supports read and write operations.
The next step is to Create a Database and Container.
Create a Database and Container

To create a new container, we need to enter the Database ID and Container Id also with the Partition Key.
Below are the details which we have entered.

View after Creating Container

Now we have a database and container created.
Now let’s begin with Aspire.Hosting.Azure.Storage to the project.
Configuring Host Project
Let’s begin with adding the NuGet Package to AspireAppCos.AppHost Project.
Adding NuGet Package
- Aspire.Hosting.Azure.CosmosDB
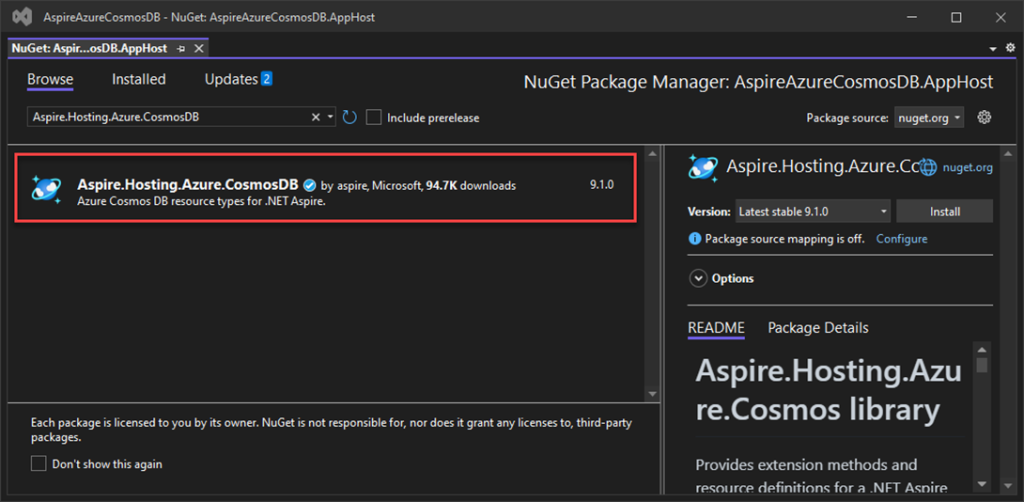
View after Adding Aspire.Hosting.Azure.CosmosDB NuGet packages to the project.

Adding Connection String to appsettings.json
In this part, we are going to copy the connection from the Azure Cosmos DB account which we have created.

Added connection string to appsettings.json file
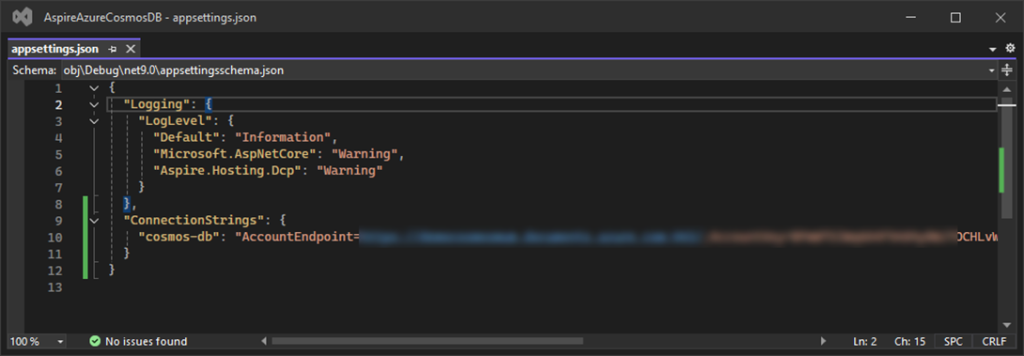
After adding the connection string in the appsettings.json file we are going to use this connection string in Program.cs.
Adding changes to the Program.cs
In this part, we are going to use the AddConnectionString extension method and pass the Name of the parameter resource. The value of the connection string is read from the “ConnectionStrings:{resourcename}” ConnectionStrings(“cosmos-db”) configuration section.
var builder = DistributedApplication.CreateBuilder(args);

var cache = builder.AddRedis("cache");

var blobs = builder.AddConnectionString("cosmos-db");

var apiService = builder.AddProject<Projects.AspireAzureCosmosDB_ApiService>("apiservice")
    .WithReference(blobs);

builder.AddProject<Projects.AspireAzureCosmosDB_Web>("webfrontend")
    .WithExternalHttpEndpoints()
    .WithReference(cache)
    .WaitFor(cache)
    .WithReference(apiService)
    .WaitFor(apiService);

builder.Build().Run();
Now we have completed the configuration with the Host project we are going to work on the Client project configuration which is AspireAzureCosmosDB.ApiService.
Client Project (AspireAzureCosmosDB.ApiService)

In this AspireAzureCosmosDB.ApiService projectwe are going to add 3 NuGet Packages.
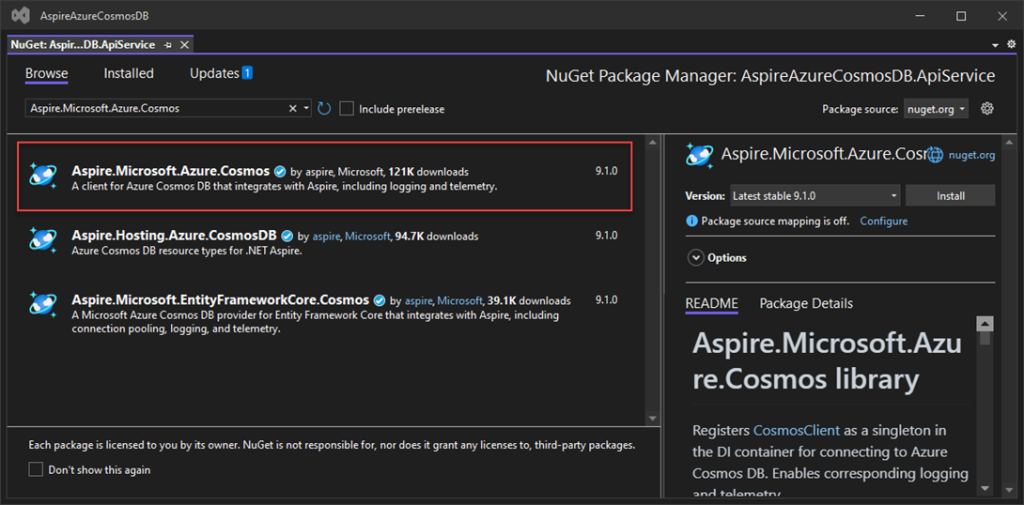
- Aspire.Microsoft.Azure.Cosmos
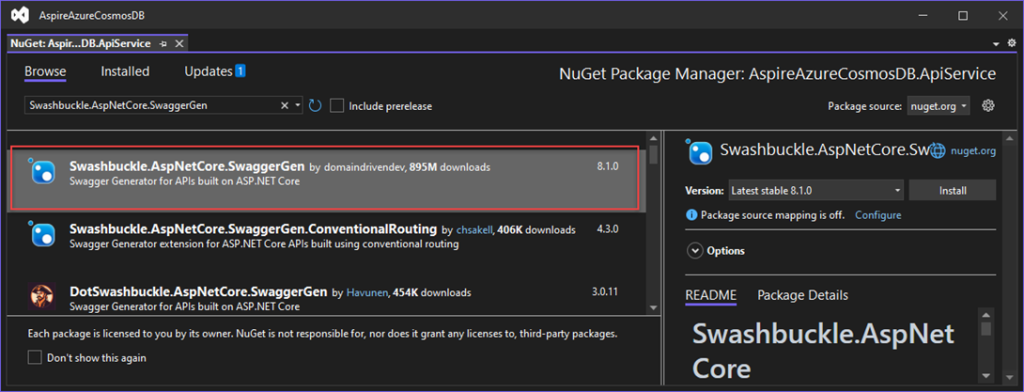
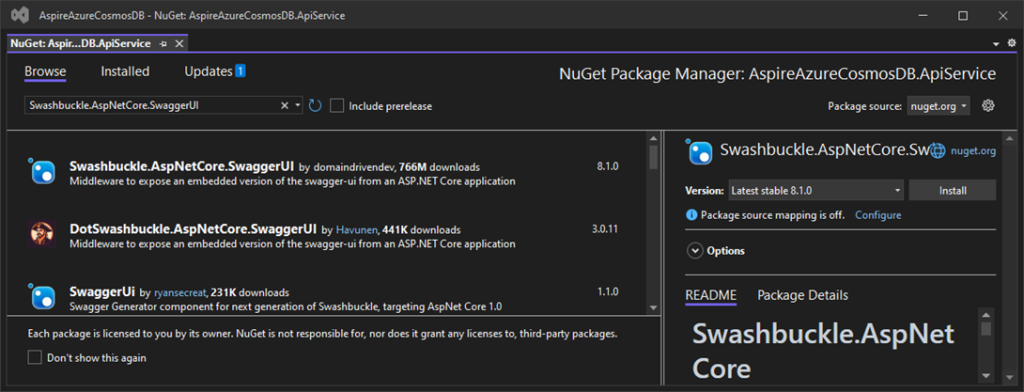
- Swashbuckle.AspNetCore.SwaggerGen
- Swashbuckle.AspNetCore.SwaggerUI
Aspire.Microsoft.Azure.Cosmos:
- Part of the Aspire framework, designed for easier integration with Azure Cosmos DB.
- Simplifies working with Cosmos DB by providing abstraction and utility methods.
- Helps manage database connections, operations, and configurations.
Swashbuckle.AspNetCore.SwaggerGen:
- Generates OpenAPI/Swagger documentation for ASP.NET Core APIs.
- Automatically creates API definitions based on controllers and routes.
- Supports attributes for custom descriptions, response types, and examples.
Swashbuckle.AspNetCore.SwaggerUI:
- Provides a user-friendly UI to interact with your API using Swagger docs.
- Enables testing endpoints directly from the browser.
- Allows customization of the interface and documentation display.
Begin by installing the Aspire.Microsoft.Azure.Cosmos NuGet package
Next, add the Swashbuckle.AspNetCore.SwaggerGen NuGet package
followed by the Swashbuckle.AspNetCore.SwaggerUI NuGet package
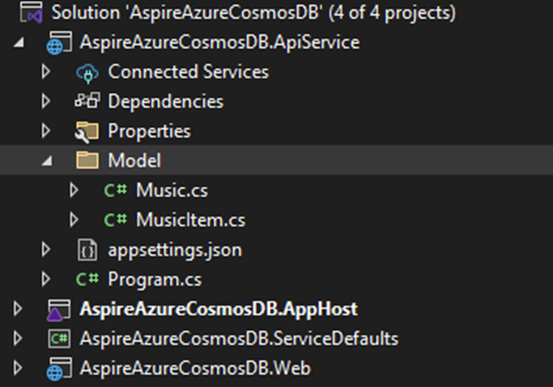
Solution View after adding the package.

Adding Model
We are going to add 2 Models.
- MusicItem -Main Model
- Music – for input
MusicItem Model
namespace AspireAzureCosmosDB.ApiService.Model
{
    public class MusicItem
    {
        public string id { get; set; }
        public string Artist { get; set; }
        public string Title { get; set; }
        public string Description { get; set; }
        public string ArtistUrl { get; set; }
        public string AlbumUrl { get; set; }
        public string AlbumName { get; set; }
        public string releaseYear { get; set; }

    }
}
Music Model
namespace AspireAzureCosmosDB.ApiService.Model
{
    public class Music
    {
        public string Artist { get; set; }
        public string Title { get; set; }
        public string Description { get; set; }
        public string ArtistUrl { get; set; }
        public string AlbumUrl { get; set; }
        public string AlbumName { get; set; }
        public string releaseYear { get; set; }
    }
}
Adding CosmosService Class
CosmosService provides a reusable way to perform CRUD (Create, Read, Update, Delete) operations on a Cosmos DB container using Microsoft.Azure.Cosmos SDK.
- Initialization:
- Takes a CosmosClient in the constructor to connect to the database.
- Sets the target container using GetContainer(“MusicStore”, “MusicContainer”).
- CRUD Operations:
- AddItemAsync<T>: Adds an item of type T to the container.
- DeleteItemAsync<T>: Deletes an item by ID using its partition key.
- GetItemAsync<T>: Retrieves an item by ID, handling “not found” errors gracefully.
- GetItemsAsync<T>: Executes a query and returns a list of matching items.
CosmosService Constructor
- Container container: A Container object representing a specific database container in Cosmos DB.
- The constructor accepts a CosmosClient object, which is responsible for connecting to Cosmos DB.
- GetContainer(“MusicStore”, “MusicContainer”) sets the container to “MusicContainer” within the “MusicStore” database.
- The database and container names are hardcoded here; you could make these configurable.
 public CosmosService(CosmosClient client)
 {
     this.container = client.GetContainer("MusicStore", "MusicContainer");
 }
Source Code of Cosmos Service
using Microsoft.Azure.Cosmos;

namespace AspireAzureCosmosDB.ApiService
{
    public class CosmosService
    {
        Container container;

        public CosmosService(CosmosClient client)
        {
            this.container = client.GetContainer("MusicStore", "MusicContainer");
        }

        public async Task AddItemAsync<T>(T item)
        {
            await this.container.CreateItemAsync<T>(item);
        }

        public async Task DeleteItemAsync<T>(string id, PartitionKey partitionKey)
        {
            await this.container.DeleteItemAsync<T>(id, partitionKey);
        }

        public async Task<T> GetItemAsync<T>(string id, PartitionKey partitionKey)
        {
            try
            {
                ItemResponse<T> response = await this.container.ReadItemAsync<T>(id, partitionKey);
                return response.Resource;
            }
            catch (CosmosException ex) when (ex.StatusCode == System.Net.HttpStatusCode.NotFound)
            {
                return default;
            }
            catch (CosmosException ex)
            {
                // Log unexpected exceptions
                Console.WriteLine($"Cosmos DB Error: {ex.Message}");
                throw;
            }
        }


        public async Task<IEnumerable<T>> GetItemsAsync<T>(string queryString)
        {
            var query = this.container.GetItemQueryIterator<T>(new QueryDefinition(queryString));
            List<T> results = new List<T>();
            while (query.HasMoreResults)
            {
                var response = await query.ReadNextAsync();
                results.AddRange(response.ToList());
            }
            return results;
        }

    }
}
Registering service in Program.cs class
Service Configuration:
- builder.AddServiceDefaults() sets up default services for the application.
- builder.AddAzureCosmosClient(connectionName: “cosmos-db”) configures a Cosmos DB client using the specified connection name.
Dependency Injection & Middleware:
- Registers services like ProblemDetails for standardized error responses.
- Adds controllers and Swagger for API documentation (AddSwaggerGen and UseSwaggerUI).
- CosmosService is registered as a scoped service for handling Cosmos DB operations.
using AspireAzureCosmosDB.ApiService;

var builder = WebApplication.CreateBuilder(args);

// Add service defaults & Aspire client integrations.
builder.AddServiceDefaults();

builder.AddAzureCosmosClient(connectionName: "cosmos-db");

// Add services to the container.
builder.Services.AddProblemDetails();

// Add API Documentation
builder.Services.AddSwaggerGen();

// Add controllers services
builder.Services.AddControllers();

builder.Services.AddScoped<CosmosService>();

var app = builder.Build();

// Configure the HTTP request pipeline.
app.UseExceptionHandler();

if (app.Environment.IsDevelopment())
{
    app.MapOpenApi();
}

// MapControllers is used to map the controllers to the application.
app.MapControllers();

// Register the Swagger generator and the Swagger UI middlewares
app.UseSwagger();

// Enable middleware to serve generated Swagger as a JSON endpoint
app.UseSwaggerUI();

app.MapDefaultEndpoints();

app.Run();
After registering the service next, we are going to add a controller.
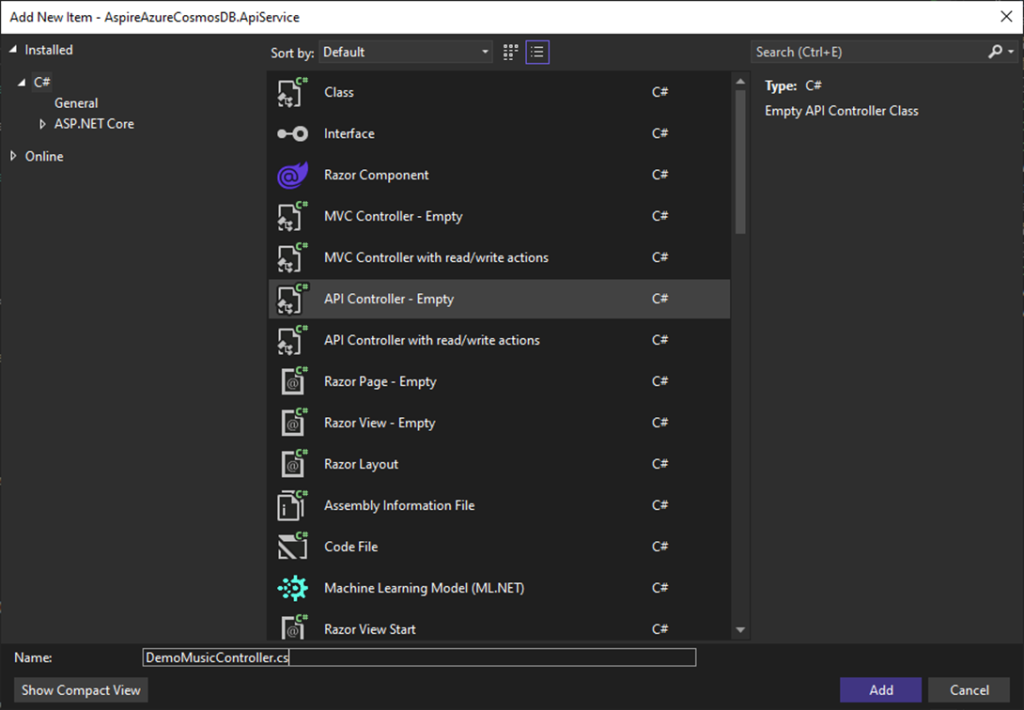
Adding APIController
Let’s create a simple DemoMusicController to demonstrate API functionality. It will use the registered CosmosService for database interactions.
The DemoMusicController handles CRUD operations for MusicItem in Cosmos DB using
Dependency injection for CosmosService.
- Constructor
- Initializes CosmosService using dependency injection.
- GET All Items
- Retrieves all MusicItem objects from Cosmos DB.
- GET Item by ID
- Fetches a single MusicItem using the provided ID.
- POST Create Item
- Creates a new MusicItem using data from the request body.
- Hardcodes the ID to “1” (consider dynamic ID generation).
- DELETE Item by ID
- Deletes a MusicItem based on the given ID.
Source Code of DemoController
using AspireAzureCosmosDB.ApiService.Model;
using Microsoft.AspNetCore.Http;
using Microsoft.AspNetCore.Mvc;
using Microsoft.Azure.Cosmos;
namespace AspireAzureCosmosDB.ApiService
{
[Route("api/[controller]")]
[ApiController]
public class DemoController : ControllerBase
{
private readonly CosmosService _CosmosService;
PartitionKey PartitionKey = new PartitionKey("2023");
public DemoController(CosmosService cosmosService)
{
_CosmosService = cosmosService;
}
[HttpGet]
public async Task<IEnumerable<MusicItem>> Get()
{
var query = "SELECT * FROM c";
return await _CosmosService.GetItemsAsync<MusicItem>(query);
}
[HttpGet("{id}")]
public async Task<MusicItem> Get(string id)
{
return await _CosmosService.GetItemAsync<MusicItem>(id, PartitionKey);
}
[HttpPost]
public async Task Post([FromBody] Music music)
{
MusicItem MusicItem = new MusicItem()
{
id = "1",
Artist = music.Artist,
Title = music.Title,
Description = music.Description,
ArtistUrl = music.ArtistUrl,
AlbumUrl = music.AlbumUrl,
AlbumName = music.AlbumName,
releaseYear = music.releaseYear
};
await _CosmosService.AddItemAsync<MusicItem>(MusicItem);
}
[HttpDelete("{id}")]
public async Task Delete(string id)
{
await _CosmosService.DeleteItemAsync<MusicItem>(id, PartitionKey);
}
}
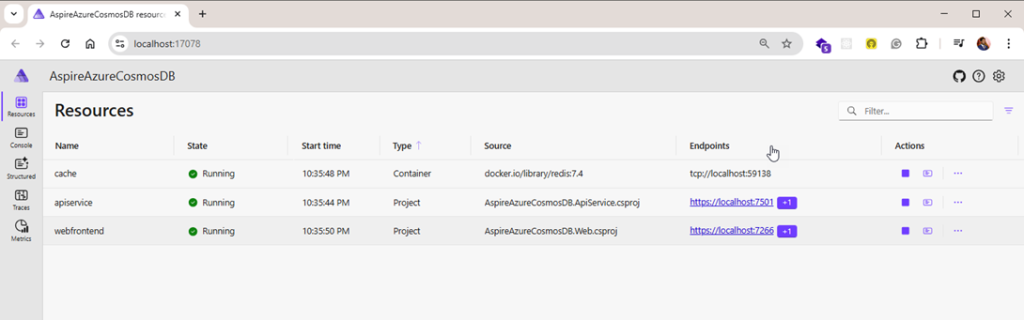
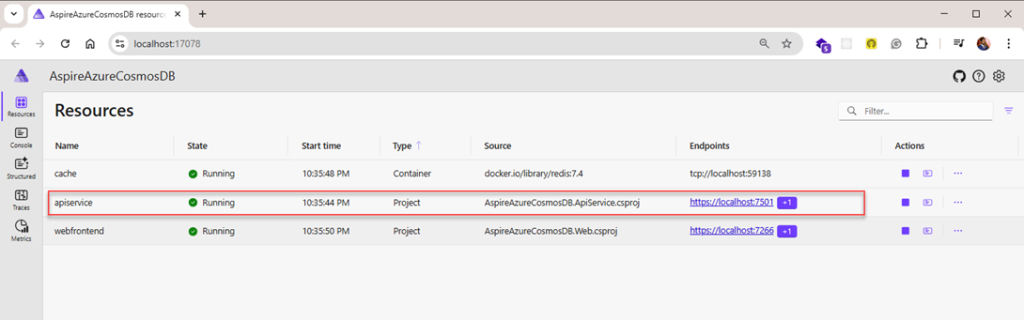
}After completing the integration with the API Service, we can now run the application for the first time.
This is the Dashboard for Aspire project where you will see all applications which are running.
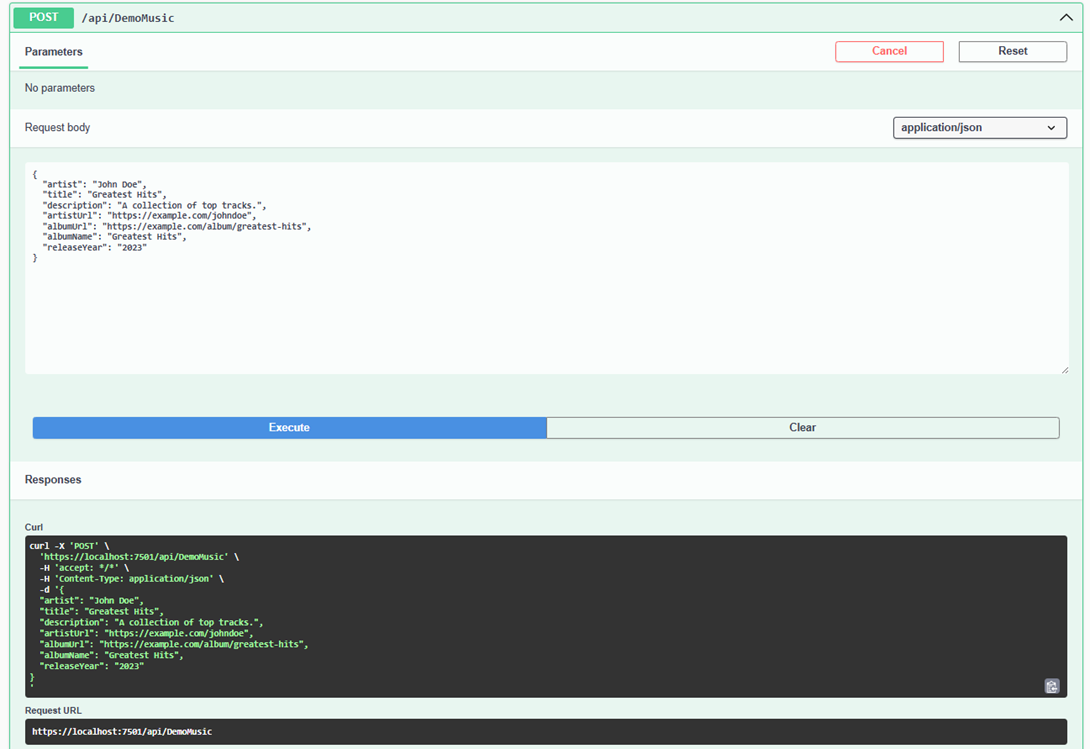
Call API Service for Inserting Data into Cosmos DB.
As we have configured swagger in the Api service, we can see the generated Data from UI calling the API service localhost URL and then appending it with the swagger keyword will land you to the swagger page.
The URL to access is your localhost application. With an appending swagger keyword at the end. https://localhost:7501/swagger/index.html

Inserting Data using API

Inserted Data into Azure Cosmos DB

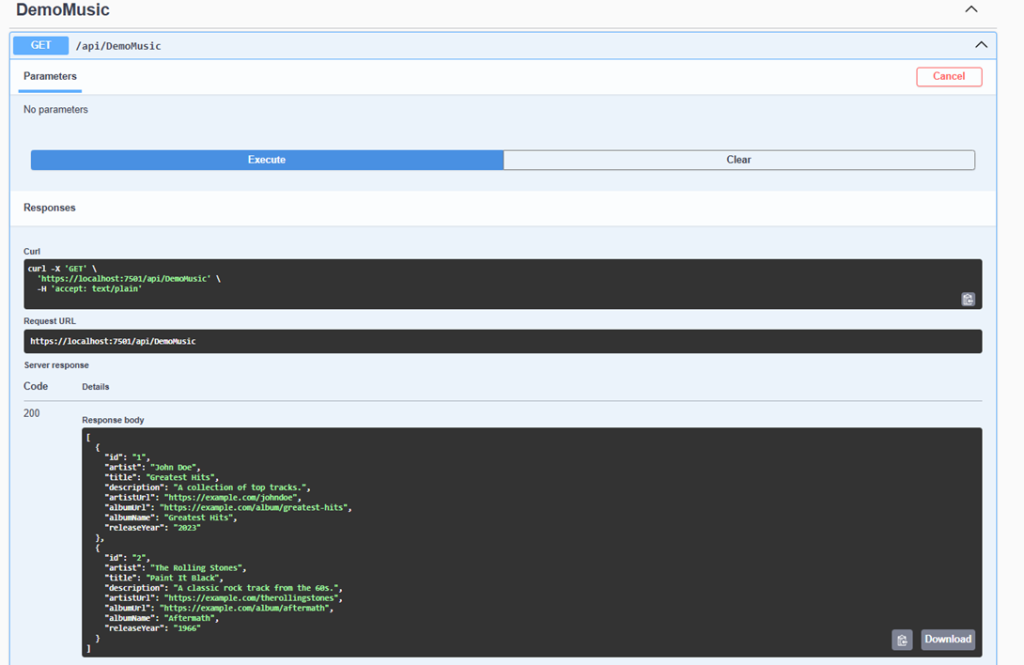
Get All Music Stored Items
Calling this API will return all Music items that are stored.
Get Music Id
Calling this API will retrieve a specific music item by its ID.

Delete Music
Will delete the Music item by Id.

View After deleting the Record.
View from Azure Data Explorer after deleting an item from Cosmos DB.

Conclusion
Integrating with .NET Aspire to build cloud-native applications unlocks the full potential of Azure Cosmos DB, enabling seamless data management with high availability, scalability, and low-latency access. By leveraging .NET Aspire’s capabilities, developers can efficiently handle complex data models, optimize performance, and ensure reliability in distributed environments. This integration empowers businesses to build modern, resilient applications that can scale globally while maintaining consistent and fast data access.
Embracing cloud-native patterns with .NET Aspire and Azure Cosmos DB sets the foundation for creating robust, future-proof applications that can adapt to the evolving needs of users and enterprises alike.
Links :- https://tutexchange.com/how-to-integrate-net-aspire-with-azure-data-table/
Link :- How to integrate .NET Aspire with Azure Blob Storage