

Implementing role management is a fundamental part of securing modern web applications. Role-based Authorization in ASP.NET Core allows you to control access to different parts of your application based on user roles, such as Admin, Manager, or User.
In this article, we are going to learn how to add roles, assign roles to users, and authorize users based on those roles — all explained in a clear, step-by-step manner. By the end of this guide, you’ll be able to manage user access efficiently using role-based security in your ASP.NET Core application.


In the last article, we have learnt how to customise ASP.NET Core Identity now we are going to use the same application for doing role-based Authorization.
- Seed Roles Data in ASP.NET Core Identity
- Adding AssignViewUserRoleModel Class
- Adding Controller AssignRoletoUser
- Adding Assign HTTP GET Action Method
- Getting List of Users for displaying AutoComplete
- Installing Microsoft.AspNetCore.Mvc.NewtonsoftJson NuGet Package
- Code Snippet of Assign HTTP POST Action Method
- Assigning Role to User (‘demouser@demo.com’)
- Assigning Role to Admin(‘demoadmin@demo.com’)
- Logging in with User Credentials
- Logging in with Admin Credentials
Seed Roles Data in ASP.NET Core Identity
For creating roles, we can either seed data once in the application and add all roles which we required.
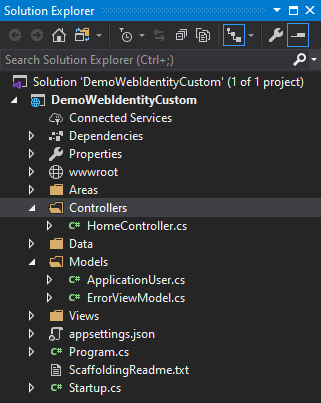
Below is the application structure we already have.

In Data folder we are going to add class ‘SeedDataApplicationRoles‘ inside this class we are going to have a method name SeedAspNetRoles this method takes RoleManager as a parameter as input.
For creating roles, we have created a list of roles then using foreach loop we are going to iterate list of roles and then get each role name, this role name which we get we are going to pass to RoleExistsAsync method to check does role already exist if isn’t then we are going to create role by passing role name to CreateAsync method.
Code Snippet
using Microsoft.AspNetCore.Identity;
using System.Collections.Generic;

namespace DemoWebIdentityCustom.Data
{
    public static class SeedDataApplicationRoles
    {
        public static void SeedAspNetRoles(RoleManager<IdentityRole> roleManager)
        {
            List<string> roleList = new List<string>()
            {
                "Admin",
                "SuperAdmin",
                "User",
                "ReportAdmin"
            };

            foreach (var role in roleList)
            {
                var result =  roleManager.RoleExistsAsync(role).Result;
                if (!result)
                {
                     roleManager.CreateAsync(new IdentityRole(role));
                }
            }
        }
    }
}
After creating SeedDataApplicationRoles class and SeedAspNetRoles method next, we are going to calling this class in Configure method as shown below.
public void Configure(IApplicationBuilder app, IWebHostEnvironment env, RoleManager<IdentityRole> roleManager)
        {

            SeedDataApplicationRoles.SeedAspNetRoles(roleManager);

            if (env.IsDevelopment())
            {
                app.UseDeveloperExceptionPage();
                app.UseDatabaseErrorPage();
            }
            else
            {
                app.UseExceptionHandler("/Home/Error");

                app.UseHsts();
            }
            app.UseHttpsRedirection();
            app.UseStaticFiles();
            app.UseRouting();
            app.UseAuthentication();
            app.UseAuthorization();

            app.UseEndpoints(endpoints =>
            {
                endpoints.MapControllerRoute(
                    name: "default",
                    pattern: "{controller=Home}/{action=Index}/{id?}");
                endpoints.MapRazorPages();
            });
        }
Next step is to run an application and then check ASPNETRoles Tables to see Roles are inserted in it.


After adding roles next, we are going to assign roles to the user for doing this; we are going to create UI.
Where we select role name and username and then assign a role to User.
Adding AssignViewUserRoleModel Class
Let’s begin by creating a class AssignViewUserRoleModel in this class we are going to add four properties RoleId, Listofrole, UserId, Username. This Model will be used for creating View to Assign roles to Users.
using Microsoft.AspNetCore.Mvc.Rendering;
using System.Collections.Generic;
using System.ComponentModel;
using System.ComponentModel.DataAnnotations;

namespace DemoWebIdentityCustom.Models
{
    public class AssignViewUserRoleModel
    {
        [DisplayName("Role")]
        [Required(ErrorMessage = "Choose Role")]
        public string RoleId { get; set; }
        public List<SelectListItem> ListRole { get; set; }
        [DisplayName("User")]
        [Required(ErrorMessage = "Choose Username")]
        public string UserId { get; set; }
        [Required(ErrorMessage = "Choose Username")]
        public string Username { get; set; }
    }
}
Now we have added class AssignViewUserRoleModel next we are going to add a controller with Name AssignRoletoUserController.
Adding Controller AssignRoletoUser
This controller will have a Parameterized Constructor which has three parameters as input ApplicationDbContext, UserManager<ApplicationUser>, RoleManager<IdentityRole> this will parameters will get resolve by Dependency injection dynamically.
using DemoWebIdentityCustom.Data;
using DemoWebIdentityCustom.Models;
using Microsoft.AspNetCore.Identity;
using Microsoft.AspNetCore.Mvc;

namespace DemoWebIdentityCustom.Controllers
{
    public class AssignRoletoUserController : Controller
    {
        readonly ApplicationDbContext _context;
        readonly UserManager<ApplicationUser> _userManager;
        readonly RoleManager<IdentityRole> _roleManager;
        public AssignRoletoUserController(ApplicationDbContext applicationDbContext,
            UserManager<ApplicationUser> userManager,
            RoleManager<IdentityRole> roleManager)
        {
            _context = applicationDbContext;
            _userManager = userManager;
            _roleManager = roleManager;
        }

        public IActionResult Index()
        {
            return View();
        }
    }
}
Adding Assign HTTP GET Action Method
In Next step we are going to add Get Action method with name Assign in this action method we are going to create an instance of AssignViewUserRoleModel then we are going to get all roles and assign it Listofrole property of AssignViewUserRoleModel class to bind a dropdown list of roles on view.
        [HttpGet]
        public IActionResult Assign()
        {
            var model = new AssignViewUserRoleModel();

            var allroles = (from roles in _context.Roles.ToList()
                            select new SelectListItem
                            {
                                Value = roles.Id,
                                Text = roles.Name
                            }).ToList();


            allroles.Insert(0, (new SelectListItem()
            {
                Text = "Select",
                Value = "",
                Selected = true
            }));

            model.ListRole = allroles;
            return View(model);
        }
After adding get action next, we are going to show Users list as AutoComplete on View for that we are going to add another Action Method GetAllUsers which takes Username string parameter as input and returns Json object.
We are using Autocomplete here because if the list of User increase then we cannot bind all User to the Dropdown list is useful to Use Autocomplete here.
Getting List of Users for displaying AutoComplete
public ActionResult GetAllUsers(string username)
{
            try
            {
                var allUsers = (from user in _context.Users.ToList()
                                where user.UserName.Contains(username)
                                select new SelectListItem
                                {
                                    Value = user.Id,
                                    Text = user.UserName
                                }).ToList();

                return Json(allUsers);

            }
            catch (Exception)
            {
                throw;
            }
}
Below is the complete Code snippet of Assign View.
Code Snippet of Assign View
@model AssignViewUserRoleModel
@{
    ViewData["Title"] = "Assign";
}
<div class="row">
    <div class="col-md-4">

        @if (TempData["Message"] != null)
        {
            <div class="alert alert-success">
                <strong>Success!</strong>  @TempData["Message"]
            </div>
        }

        <form asp-controller="AssignRoletoUser" asp-action="Assign" method="post">
            <h4>Assign Role to User</h4>
            <hr />
            <div asp-validation-summary="All" class="text-danger"></div>
            <input type="hidden" asp-for="UserId" />
            <div class="form-group">
                <label asp-for="Username"></label>
                <input asp-for="Username" class="form-control" />
                <span asp-validation-for="Username" class="text-danger"></span>
            </div>
            <div class="form-group">
                <label asp-for="RoleId"></label>

                <select asp-for="RoleId"
                        class="form-control"
                        asp-items="@(new SelectList(Model.ListRole,"Value", "Text"))">
                </select>
                <span asp-validation-for="@Model.RoleId" class="text-danger"></span>
            </div>
            <button type="submit" class="btn btn-primary">Register</button>
        </form>
    </div>

</div>


<link rel="stylesheet" href="//code.jquery.com/ui/1.12.1/themes/base/jquery-ui.css">
<script src="https://code.jquery.com/ui/1.12.1/jquery-ui.js"></script>
<script>
    $(document).ready(function () {
        // AutoComplete for Usernames
        $("#Username").autocomplete({
            source: function (request, response) {
                $.ajax({
                    url: "/AssignRoletoUser/GetAllUsers",
                    type: "GET",
                    dataType: "json",
                    data: { username: request.term },
                    success: function (data) {
                        response($.map(data,
                            function (item) {
                                return { label: item.Text, value: item.Value };
                            }));
                    }
                });
            },
            error: function (response) {
                alert(response.responseText);
            },
            failure: function (response) {
                alert(response.responseText);
            },
            select: function (e, i) {
                $("#Username").val(i.item.label);
                $("#UserId").val(i.item.value);
                return false;
            },
            minLength: 1
        });
    });
</script>
After adding the view, let’s run the application to test UI we can see the Dropdown list has a list of roles but autocomplete has some issues.
Assign View


If we see in Developer tools all JSON fields in all lowercase that’s why we cannot bind data to the dropdown list.


Here we need to set the serializer in the ConfigureServices method on Start-up class for doing that first we need to add Microsoft.AspNetCore.Mvc.NewtonsoftJson package from NuGet Package.
Installing Microsoft.AspNetCore.Mvc.NewtonsoftJson NuGet Package


Next, add this line to the ConfigureServices method in Start-up class.
Code Snippet
services.AddControllersWithViews().
     AddNewtonsoftJson(options => options.SerializerSettings.ContractResolver = new DefaultContractResolver());

After setting serializer in the ConfigureServices method on Start-up class autocomplete is working perfectly.

Next step is to add Assign Http Post Action Method. This action method will take AssignViewUserRoleModel object as input.
Assign POST action method to receive AssignViewUserRoleModel object which contains Selected RoleId and Username and UserId.
Next, we are going first Validate Posted Object if it is Valid then we are going to check entered Username is exists if it is null then we are going show error message in a similar way we are going to check Roleid selected is exits if not then we are going show error message. The last check we are going to validate is to check that user already exists in a similar role which they have chosen using method IsInRoleAsync if the result is false then we are going to assign a selected role to User.
Code Snippet of Assign HTTP POST Action Method
 [HttpPost]
 public async Task<IActionResult> Assign(AssignViewUserRoleModel model)
        {

            var allroles = (from roles in _context.Roles.ToList()
                select new SelectListItem
                {
                    Value = roles.Id,
                    Text = roles.Name
                }).ToList();


            allroles.Insert(0, (new SelectListItem()
            {
                Text = "Select",
                Value = "",
                Selected = true
            }));
            model.ListRole = allroles;

            if (ModelState.IsValid)
            {
                var getuserName = await _userManager.FindByNameAsync(model.Username);
                if (getuserName == null)
                {
                    ModelState.AddModelError("", "Username does not Exists");
                    return View(model);
                }
                var getrole = await _roleManager.FindByIdAsync(model.RoleId);
                if (getrole != null)
                {
                    var isAdmin = await _userManager.IsInRoleAsync(getuserName, getrole.Name);

                    if (isAdmin == false)
                    {
                        await _userManager.AddToRoleAsync(getuserName, getrole.Name);
                    }
                    else
                    {
                        ModelState.AddModelError("", "Role Is Already Assign to User");
                        return View(model);
                    }

                }
                return View(model);
            }
            return View(model);
        }
Now we are ready to assign role before assigning role we are going see list of User and List of Roles once you will get a clear view of which role we are going to assign to which Users.
We have two users, one with name demouser and another with name demoadmin.


There are four roles available as shown below.

Now we are going to assign a User role to demouser, as shown below.
Assigning Role to User (demouser@demo.com)

Assigning Role to Admin(demoadmin@demo.com)

After assigning User role and Admin Role, you can View AspNetUserRoles tables where all assigned roles to users are stored.


Next step, we are going to add two new controllers UserDashboard and AdminDashboard and apply Authorize Attribute with Role Name.
On UserDashboard controller we are going apply to authorise filter with Role User, and on AdminDashboard we are going to use authorize filter with Role Admin.
We also added View for both controllers and added heading According to role name on View.
Code Snippet of UserDashboard Controller
using Microsoft.AspNetCore.Authorization;
using Microsoft.AspNetCore.Mvc;

namespace DemoWebIdentityCustom.Controllers
{
    [Authorize(Roles = "User")]
    public class UserDashboardController : Controller
    {
        public IActionResult Dashboard()
        {
            return View();
        }
    }
}
Code Snippet of AdminDashboard Controller
using Microsoft.AspNetCore.Authorization;
using Microsoft.AspNetCore.Mvc;

namespace DemoWebIdentityCustom.Controllers
{
    [Authorize(Roles = "Admin")]
    public class AdminDashboardController : Controller
    {
        public IActionResult Dashboard()
        {
            return View();
        }
    }
}
Logging in with User Credentials
Now we are going the first login with User Credentials demouser@demo.com and access User page and then Admin page to see how Authorization works.


Next, we are going to the Access User Dashboard, and we can easily access it because User is logged in with the User role.


We cannot access this controller because we have Logged in With User Role for accessing this page we need Admin Role.


Logging in with Admin Credentials
Let’s try to Login with Admin and Credentials and check to access Admin Dashboard and User Dashboard, and we can easily access the Admin Dashboard because User is logged in with Admin role.


Next, we are going to Access Admin Dashboard, and we can easily access it because User is logged in with Admin role.


We cannot access UserDashboard controller because we have Logged in With Admin Role for accessing this page we need User Role.


In this article, we have learned how to Create Role, Assign Role to User, and apply to authorize attribute on Controller.
Read more :- https://tutexchange.com/binding-dropdown-list-from-database-using-jquery-in-asp-net-core-mvc/
Read more :- https://learn.microsoft.com/en-us/aspnet/core/security/authorization/roles?view=aspnetcore-9.0