

In this article we are going learn how to integrate Azure Data Table with .Net Aspire as you know .Net Aspire is used to build cloud-native applications.


Azure Table Storage (part of Azure Storage services) is a NoSQL key-value store that’s great for storing large amounts of structured, non-relational data. It’s lightweight, fast, and supports scalable queries.
- Table: A collection of entities (like rows).
- Entity: A set of properties (like a record/row).
- Properties: Key-value pairs (columns).
- PartitionKey: Groups entities for faster queries and scalability.
- RowKey: A unique ID within a partition.
- Timestamp: Auto-generated for concurrency control.
In this article, we cover:
- Create a .Net Aspire Starter App
- Solution Explorer
- Adding Aspire.Hosting.Azure.Storage to App Host Project
- Configuring Azure Blob Storage Account
- Steps to Create a Storage Account
- Steps to Configure Blob Storage
- Adding Connection String in appsettings.json
- Adding changes in Program.cs
- Creating Azure Table on Azure
- To View from the Storage browser Viewer
- Added Properties
- Client Project (AspireAzureTableDemo.ApiService)
- Installing Aspire.Azure.Data.Tables NuGet Package
- Installing Swashbuckle.AspNetCore.SwaggerGen NuGet Package
- Installing Swashbuckle.AspNetCore.SwaggerUI NuGet Package
- Adding Inventory Class
- Adding InventoryRequest Class
- Adding TableStorageService Class
- Source Code of TableStorageService Class
- Registering TableStorageService
- Source Code of Program.cs Class of API Service.
- Adding DemoInventoryController
- Call API Service to insert data into the Azure Data Table.
- Inserting Data
- Debug Mode while Inserting Data
- Insert Data into Azure Table Storage
- Read Data from Azure Table Storage with partitionKey and rowKey
- In Debug Mode, while reading single data
- Read All Data from Azure Table Storage
- In Debug Mode while reading all the Inventory
Create a .Net Aspire Starter App.


After selecting the project, click the “Next” button to proceed.
A new dialogue will appear, prompting you to configure your new project. Within this dialogue, you will be asked to provide a Solution Name and specify the location where the project should be saved.


After entering details, click the “Next” button to proceed.
A new dialogue will appear, prompting you to configure additional information related to the project, such as the framework, the .NET Aspire version, and the option to create a test project. For this demonstration, I will select .NET Aspire 9.0.
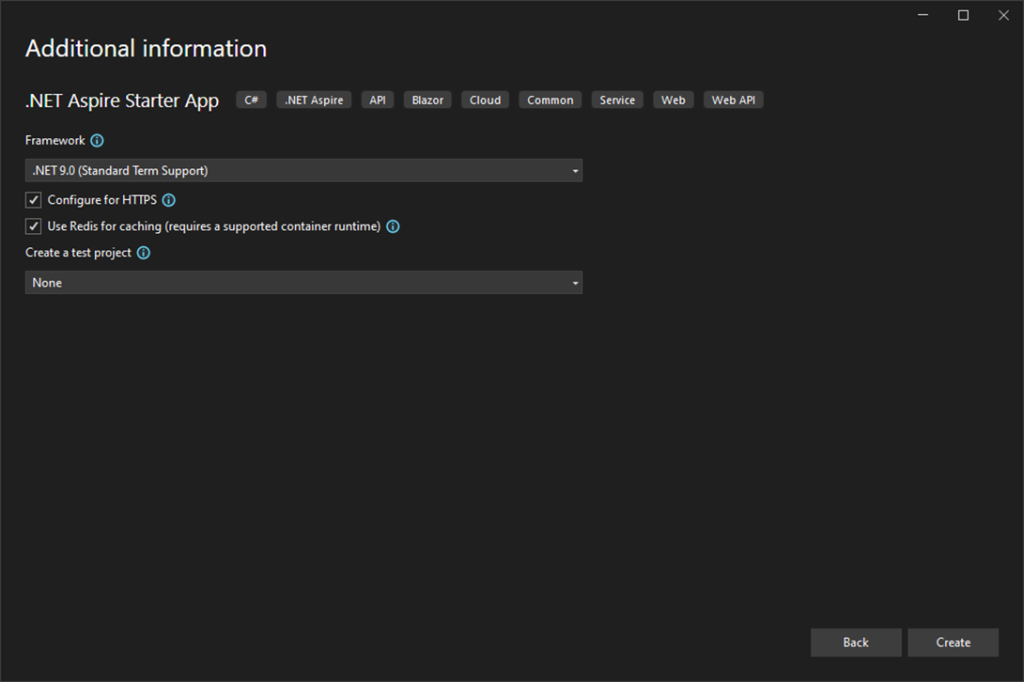
Click on the Create button to create a project.
Solution Explorer

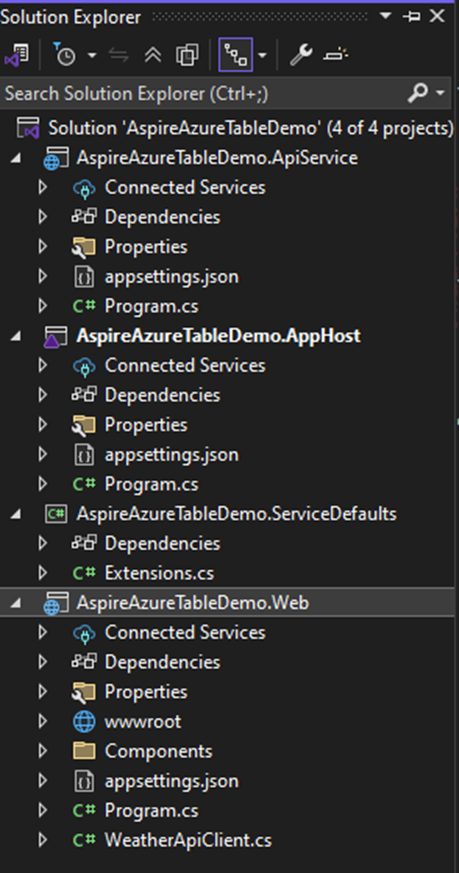
We have created a solution, so let’s begin by adding Aspire.Hosting.Azure.Storage to the project.
In this demo, we are going to configure the Aspire.Hosting.Azure.Storage.
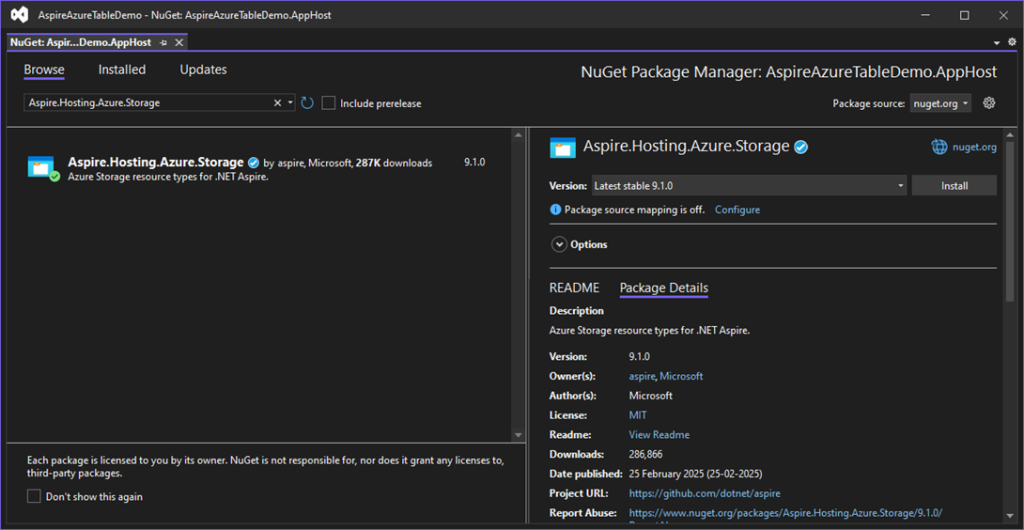
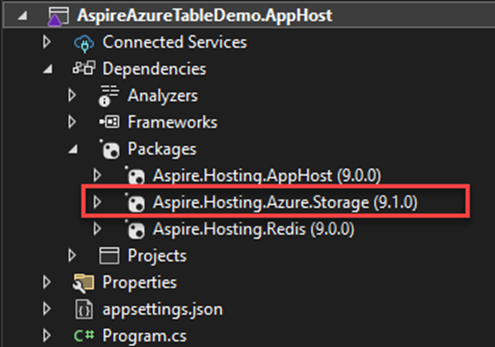
Adding Aspire.Hosting.Azure.Storage to App Host Project

View after Adding Aspire.Hosting.Azure.Storage NuGet packages to the project.

After installation, we need to add resources to the Program.cs class of AppHost project.
But we are going to use azure blob storage for access if we need access to Azure Blob storage right.
Configuring Azure Blob Storage Account
In this part we are going learn how to create Azure storage account and create Container for storing blobs in it.
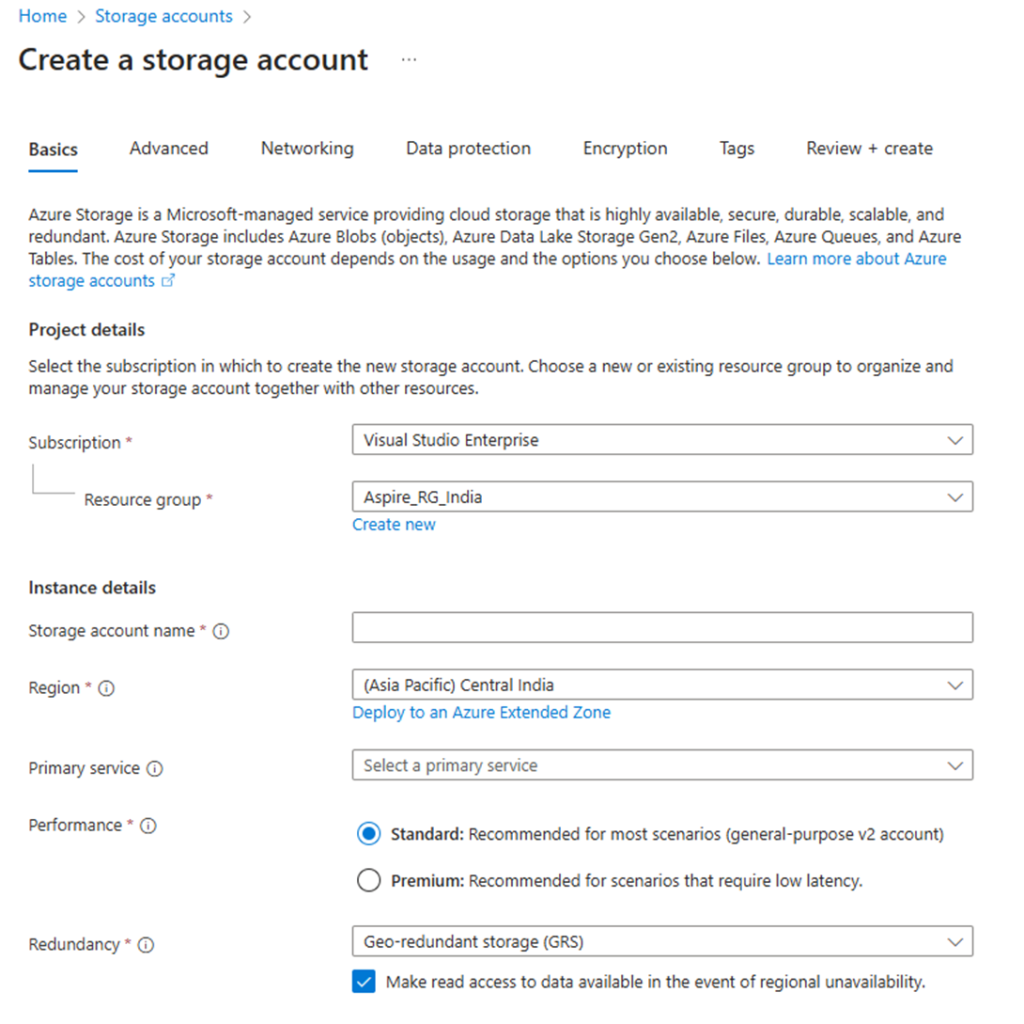
Steps to Create a Storage Account
- Navigate to Storage Accounts
- Search for “Storage accounts” in the search bar and select it.
- Click “Create”.
- Enter Basic Details
- Subscription: Select your Azure subscription.
- Resource Group: Choose an existing resource group or create a new one.
- Storage Account Name: Enter a unique name (must be globally unique and lowercase).
- Region: Select the desired region.
- Performance: Choose Standard (for general storage) or Premium (for high-performance needs).
- Redundancy: Select the replication type:
- LRS (Locally Redundant Storage)
- GRS (Geo-Redundant Storage)
- RA-GRS (Read-Access Geo-Redundant Storage)
- ZRS (Zone-Redundant Storage)
- Click “Review + Create” and then “Create”.
Steps to Configure Blob Storage
- After deployment, go to the Storage Account.
- In the left menu, select “Containers”.
- Click “+ Container”, enter a Container Name, and set the Public Access Level:
- Private (default, most secure)
- Blob (publicly readable blobs)
- Container (publicly readable blobs and container metadata)
- Click “Create”.

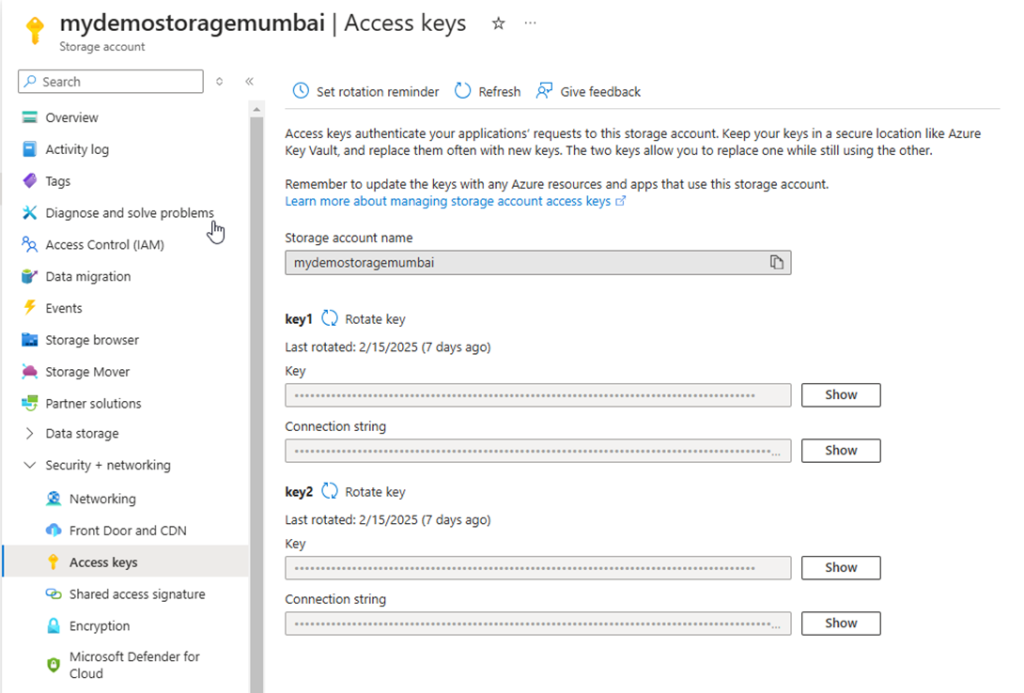
Steps to Get Access Keys & Connection String
- In the Storage Account, go to “Access keys” (left menu).
- Copy the Connection String or Access Keys for authentication in your application.

Adding Connection String in appsettings.json
As we copy connection string from azure portal and adding it to AspireAzureTableDemo.AppHost appsettings.json


Adding changes in Program.cs
In this part, we are going to use the AddConnectionString extension method and pass the Name of the parameter resource. The value of the connection string is read from the “ConnectionStrings:{resourcename}” ConnectionStrings(“blobs”) configuration section.
var builder = DistributedApplication.CreateBuilder(args);

var cache = builder.AddRedis("cache");

// Add for Azure Table Storage

var blobs = builder.AddConnectionString("blobs");

var apiService = builder.AddProject<Projects.AspireAzureTableDemo_ApiService>("apiservice")
    .WithReference(blobs);

// Add for Azure Table Storage

builder.AddProject<Projects.AspireAzureTableDemo_Web>("webfrontend")
    .WithExternalHttpEndpoints()
    .WithReference(cache)
    .WaitFor(cache)
    .WithReference(apiService)
    .WaitFor(apiService);

builder.Build().Run();
Creating Azure Table on Azure
Click on your storage account which you have created in that you will see Data Storage Menu in that select Tables.


For creating a table, click on the “+ Table” button. After that, enter the Table name which you want and click on the OK button.

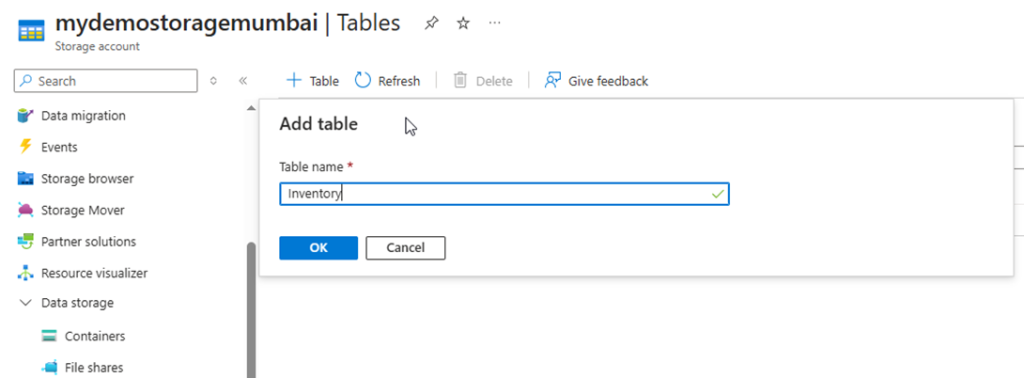
After Table is created.


After the table is created, next, we need to add PartitionKey and RowKey for doing that, either we need to open the table in “Storage browser” or download “StorageExplorer-windows”.
To View from Storage browser Viewer


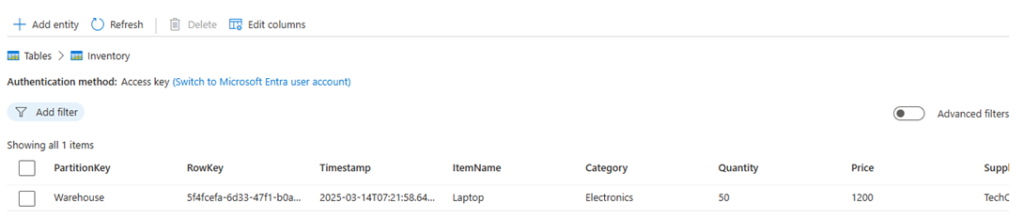
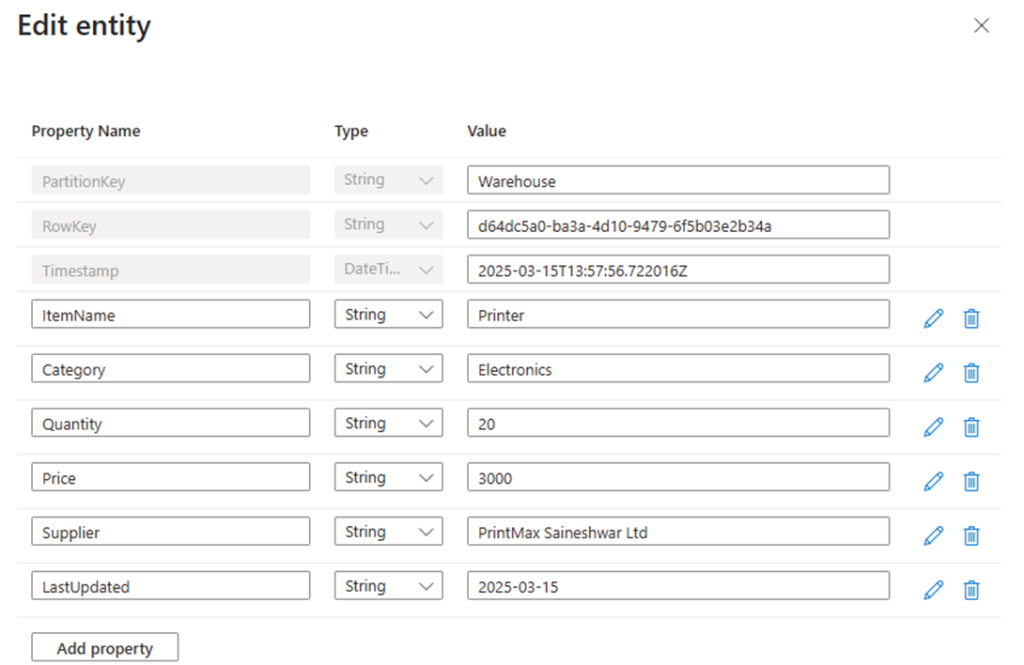
Adding Entity PartitionKey and RowKey and other Property.


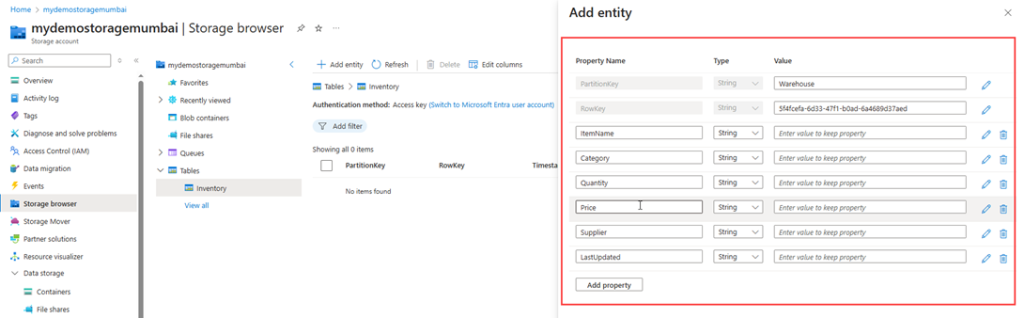
Added Properties


Click on Insert button it will get inserted as below.

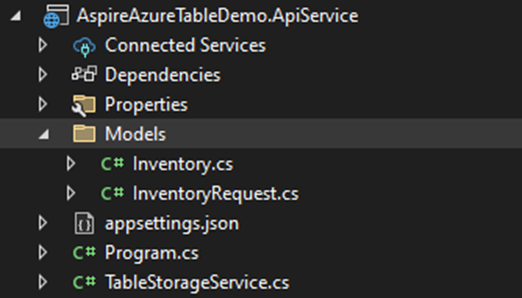
Now let configure Client which is Client Project (AspireAzureTableDemo.ApiService)
Client Project (AspireAzureTableDemo.ApiService)
In this AspireAzureTableDemo.ApiService projectwe are going to add 3 NuGet Packages.
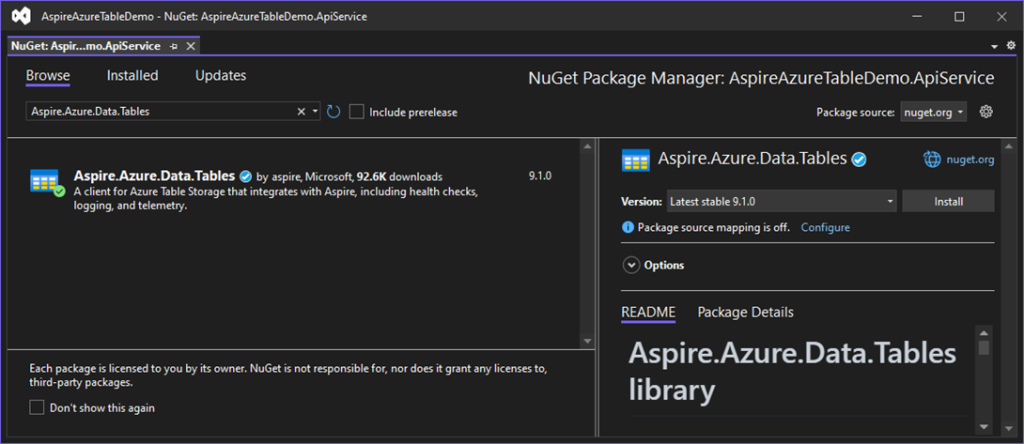
- Aspire.Azure.Data.Tables
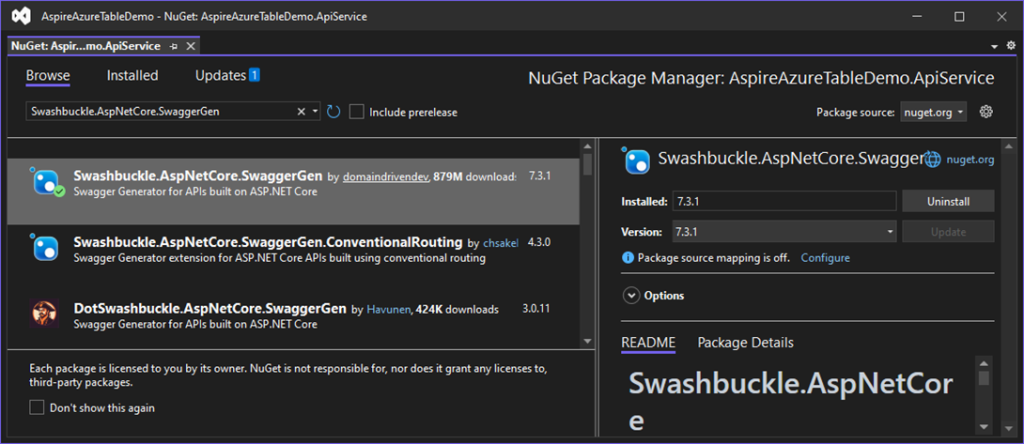
- Swashbuckle.AspNetCore.SwaggerGen
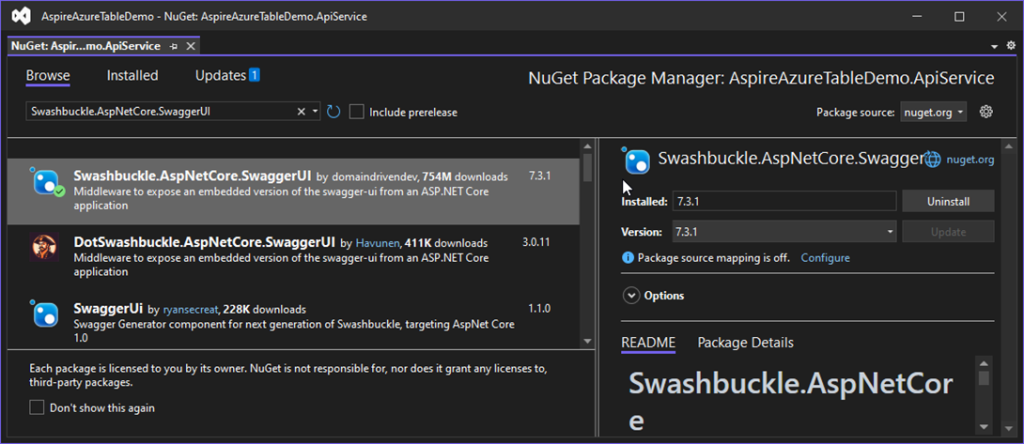
- Swashbuckle.AspNetCore.SwaggerUI
Installing Aspire.Azure.Data.Tables NuGet Package

Installing Swashbuckle.AspNetCore.SwaggerGen NuGet Package
Installing Swashbuckle.AspNetCore.SwaggerUI NuGet Package
Adding Inventory Class
We need an entity to insert data into the Azure table. For that we have added a class with the name Inventory and inherited it with ITableEntity.
using Azure;
using Azure.Data.Tables;

namespace AspireAzureTableDemo.ApiService.Models
{
    public class Inventory : ITableEntity
    {
        public string PartitionKey { get; set; } = default!;
        public string RowKey { get; set; } = default!;
        public DateTimeOffset? Timestamp { get; set; }
        public ETag ETag { get; set; } = ETag.All;

        // Custom Properties
        public string ItemName { get; set; } = default!;
        public string Category { get; set; } = default!;
        public string Quantity { get; set; } = default!;
        public string Price { get; set; } = default!;
        public string Supplier { get; set; } = default!;
        public string LastUpdated { get; set; } = DateTime.UtcNow.ToString("yyyy-MM-dd");

    }
}
Adding InventoryRequest Class
We have Added InventoryRequest class for taking input for API.
namespace AspireAzureTableDemo.ApiService.Models
{
    public class InventoryRequest
    {
        public string ItemName { get; set; } = default!;
        public string Category { get; set; } = default!;
        public string Quantity { get; set; } = default!;
        public string Price { get; set; } = default!;
        public string Supplier { get; set; } = default!;
    }
}
Next, we are going to add TableStorageService Class.
Adding TableStorageService Class
This is a class in which we are going to inject TableServiceClient use that we are going to Insert, read data.

Source Code of TableStorageService Class
using AspireAzureTableDemo.ApiService.Models;
using Azure.Data.Tables;

namespace AspireAzureTableDemo.ApiService
{
    public class TableStorageService
    {
        private readonly TableServiceClient _tableServiceClient;
        private readonly TableClient _tableClient;


        public TableStorageService(TableServiceClient tableServiceClient)
        {
            _tableServiceClient = tableServiceClient;
            _tableClient = _tableServiceClient.GetTableClient("Inventory");
            _tableClient.CreateIfNotExists();
        }

        public async Task AddInventoryAsync(Inventory inventory)
        {
            try
            {
                var containerClient = await _tableClient.AddEntityAsync<Inventory>(inventory);

            }
            catch (Exception)
            {

                throw;
            }
        }

        public async Task<Inventory?> GetInventoryAsync(string partitionKey, string rowKey)
        {
            return await _tableClient.GetEntityAsync<Inventory>(partitionKey, rowKey);
        }


        public async Task<IEnumerable<Inventory>> GetAllInventorysAsync()
        {
            List<Inventory> Inventorys = new();
            await foreach (var entity in _tableClient.QueryAsync<Inventory>())
            {
                Inventorys.Add(entity);
            }
            return Inventorys;
        }
    }
}
Now we have added BlobStorageService class but we need to register it in Program.cs class to inject.
Registering TableStorageService
builder.Services.AddScoped<TableStorageService>();
Source Code of Program.cs Class of API Service.
using AspireBlob.ApiService;
using Microsoft.Extensions.Azure;

var builder = WebApplication.CreateBuilder(args);

// Add service defaults & Aspire client integrations.
builder.AddServiceDefaults();

builder.AddAzureTableClient("blobs");
// Add services to the container.
builder.Services.AddProblemDetails();

// Add API Documentation
builder.Services.AddSwaggerGen();

// Add controllers services
builder.Services.AddControllers();


builder.Services.AddScoped<BlobStorageService>();


// Learn more about configuring OpenAPI at https://aka.ms/aspnet/openapi
builder.Services.AddOpenApi();

var app = builder.Build();

// Configure the HTTP request pipeline.
app.UseExceptionHandler();

if (app.Environment.IsDevelopment())
{
    app.MapOpenApi();
}

// MapControllers is used to map the controllers to the application.
app.MapControllers();

// Register the Swagger generator and the Swagger UI middlewares
app.UseSwagger();

// Enable middleware to serve generated Swagger as a JSON endpoint.
app.UseSwaggerUI();


app.MapDefaultEndpoints();

app.Run();
Next, let’s add the Controller to the project, which will handle input.
Adding DemoInventoryController
We are going to add Controller with Name DemoInventory it will handle to Add Inventory, get Inventory details and get all Inventory details.
using AspireAzureTableDemo.ApiService.Models;
using Microsoft.AspNetCore.Http;
using Microsoft.AspNetCore.Mvc;

namespace AspireAzureTableDemo.ApiService
{
    [Route("api/[controller]")]
    [ApiController]
    public class DemoInventoryController : ControllerBase
    {
        private readonly TableStorageService _tableStorageService;

        /// <summary>
        ///
        /// </summary>
        /// <param name="tableStorageService"></param>
        public DemoInventoryController(TableStorageService tableStorageService)
        {
            _tableStorageService = tableStorageService;
        }

        [HttpPost]
        public async Task<IActionResult> AddInventory(InventoryRequest inventoryRequest)
        {

            var inventory = new Inventory
            {
                PartitionKey = "Warehouse",
                RowKey = Guid.NewGuid().ToString(),
                ItemName = inventoryRequest.ItemName,
                Category = inventoryRequest.Category,
                Quantity = inventoryRequest.Quantity,
                Price = inventoryRequest.Price,
                Supplier = inventoryRequest.Supplier,
                LastUpdated = DateTime.UtcNow.ToString("yyyy-MM-dd"),
                Timestamp = DateTimeOffset.UtcNow
            };

            await _tableStorageService.AddInventoryAsync(inventory);
            return Ok();
        }

        [HttpGet("{partitionKey}/{rowKey}")]
        public async Task<IActionResult> GetInventory(string partitionKey, string rowKey)
        {
            var inventory = await _tableStorageService.GetInventoryAsync(partitionKey, rowKey);
            if (inventory == null) return NotFound();
            return Ok(inventory);
        }

        [HttpGet]
        public async Task<IActionResult> GetAllInventories()
        {
            var inventories = await _tableStorageService.GetAllInventorysAsync();
            return Ok(inventories);
        }
    }
}
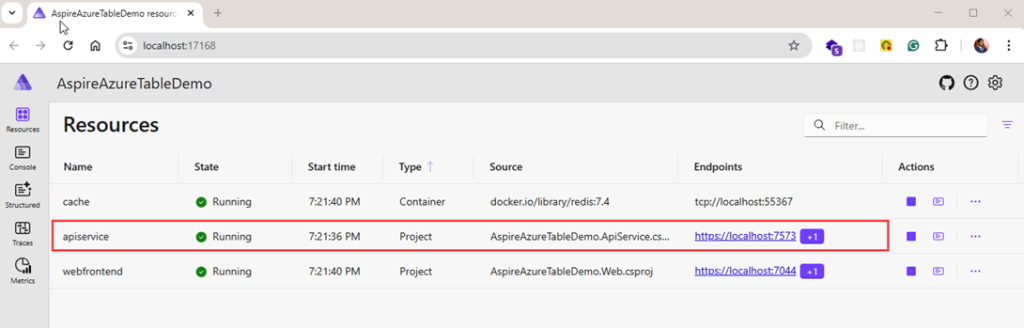
After completing the integration with the API Service, we can now run the application for the first time.
This is the Dashboard for Aspire project where you will see all applications which are running.


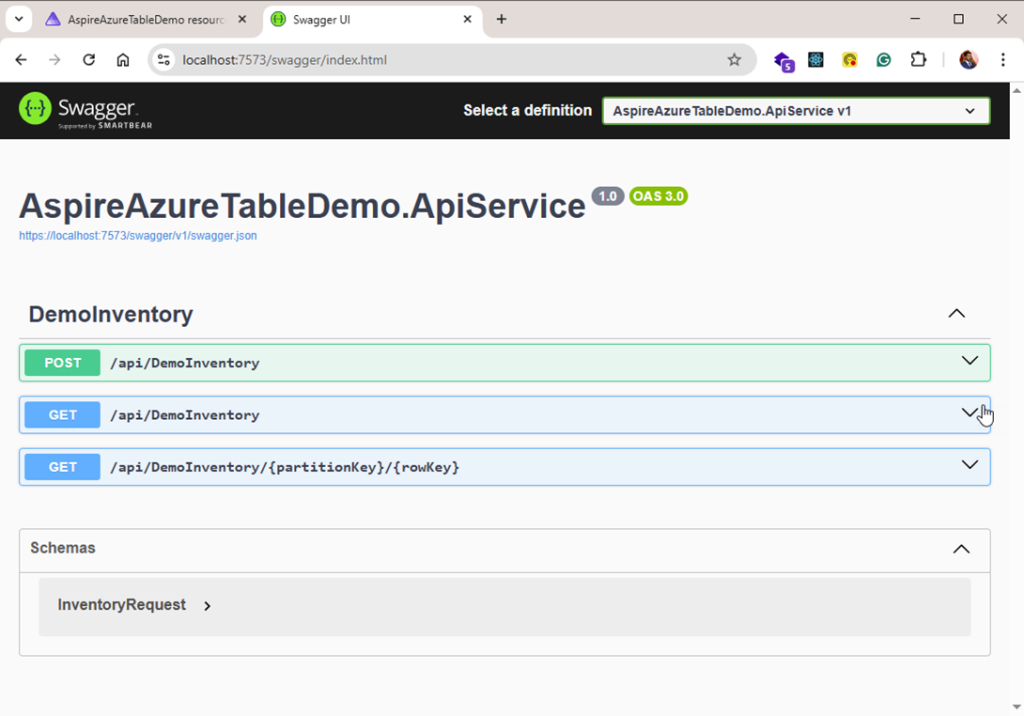
Call API Service for Inserting Data into Azure Data Table.
As we have configured swagger in Api service, we can see the generated Data from UI calling Apiservice localhost URL and then appending it with the swagger keyword will land you to the swagger page.
The URL to access is your localhost application. With an appending swagger keyword at the end. https://localhost:7573/swagger/index.html

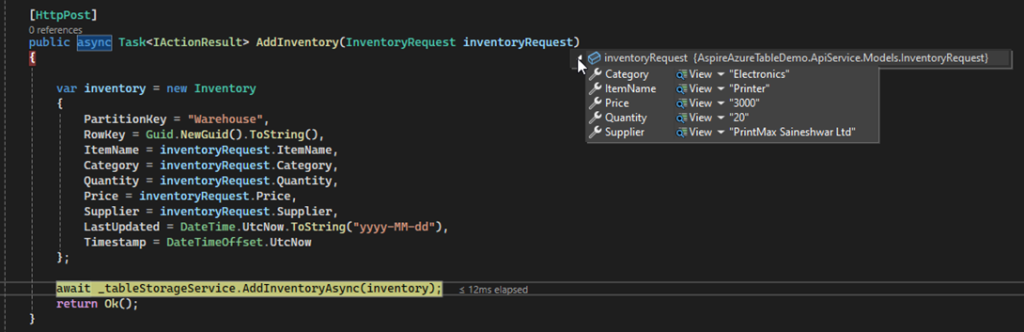
Inserting Data


Debug Mode while Inserting Data


Insert Data into Azure Table Storage


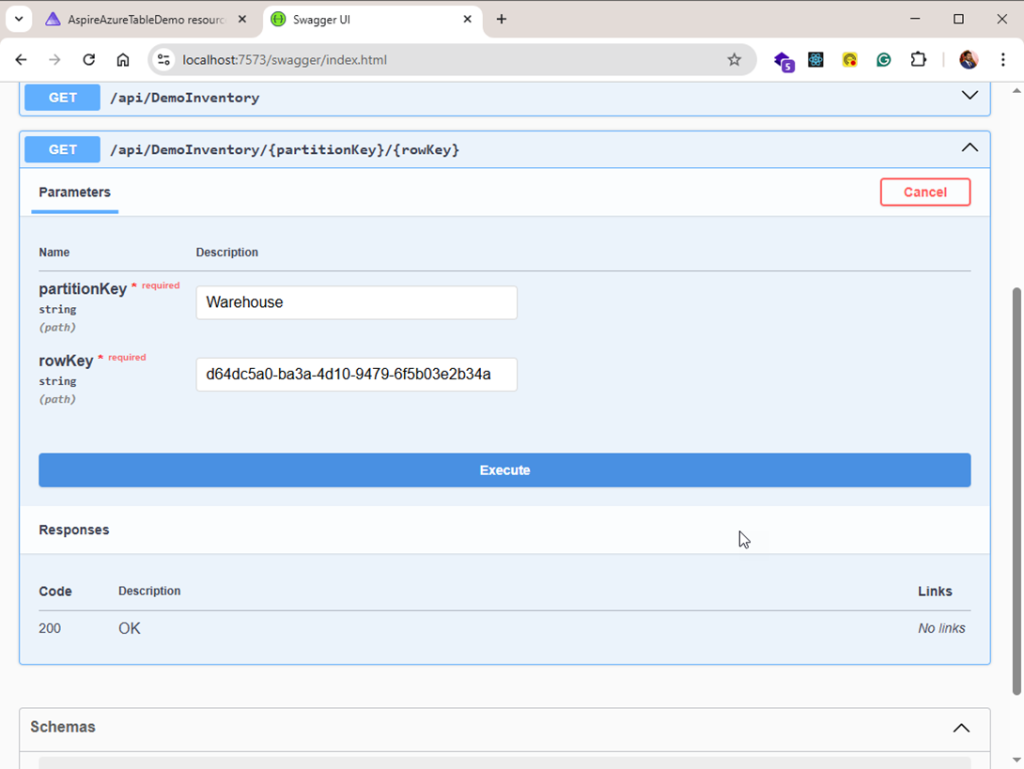
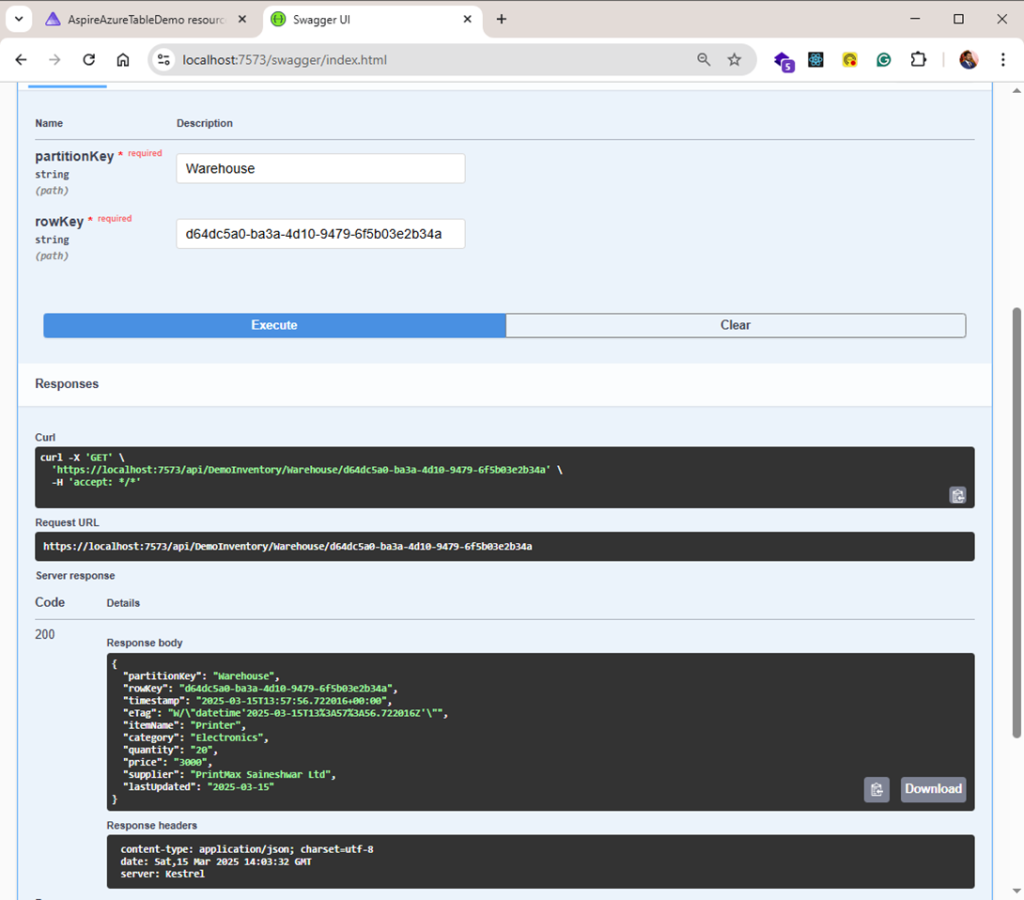
Read Data from Azure Table Storage with partitionKey and rowKey
If we want to read a specific single record, then we need to use partitionKey and rowKey.

In Debug Mode while reading single data


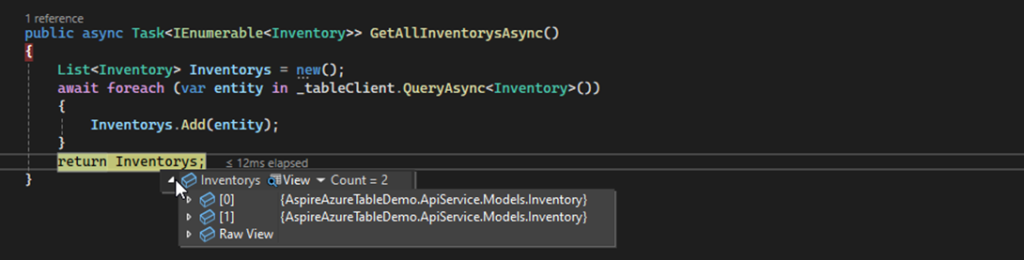
Read All Data from Azure Table Storage

In Debug Mode while reading all the Inventory

Referenced From: Microsoft Learn – ASP.NET Core Inspire Series
Conclusion
Integrating .NET Aspire with Azure Table Storage combines the power of a modern, scalable .NET application framework with the simplicity and performance of Azure’s NoSQL data store. This setup enables you to efficiently manage structured, non-relational data while benefiting from Azure’s high availability, global reach, and built-in security features.
By leveraging .NET Aspire’s capabilities — like seamless configuration, dependency injection, and resilient data handling — you can build robust, cloud-native applications that interact with Azure Table Storage effortlessly. Whether you’re handling user data, logs, or application telemetry, this integration ensures your application remains performant and scalable.
With this approach, you’re well-equipped to extend your solution further — adding caching, implementing advanced querying, or even integrating other Azure services like Azure Functions or Azure Cosmos DB if more complex scenarios arise. The combination of .NET Aspire and Azure Table Storage empowers you to create responsive, data-driven applications that can grow with your needs.
Link :- https://tutexchange.com/how-to-integrate-net-aspire-with-azure-blob-storage/
GitHub Link :- https://github.com/saineshwar/Aspire_AzureTableStorage