

Binding Dropdown List from Database Using ViewBag in ASP.NET Core
In this part, we are going to learn how to bind dropdown list in ASP.NET Core from Database using ViewBag in a step by step way.
- Creating ASP.NET Core Application
- Setting up Database and Table
- Adding Entity Framework Core package from NuGet
- Configuring Connection string in appsettings.json
- Adding Product Model
- Adding DatabaseContext Class and inheriting with DbContext class
- Adding Controller


Creating ASP.NET Core Application
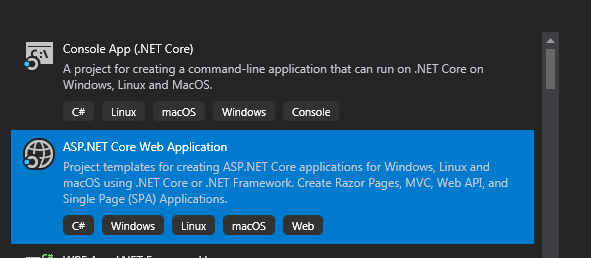
We are going to create ASP.NET Core Web Application for that we are going to choose ASP.NET Core Web Application template.

Next, we are going to set Project Name WebApplication10 and location and in last part, we are going to choose .Net Core framework and ASP.NET Core Version 3.0 as the framework for application and few advance settings for such as configuring https and enabling docker we are not going to enable docker settings for this project.


Now finally click on create button to create a project.
Project structure
The project structure generated according to the configuration.


After creating a project, we are going to run this project.
Setting up Database and Table
We have created a database with Name Sample2 and then we have added product table in it.
Below is Table structure along with a script to create a table.


Script to Create Product Table
CREATE TABLE [dbo].[Product](
	[ProductId] [int] IDENTITY(1,1) NOT NULL,
	[Name] [varchar](50) NULL,
	[Quantity] [int] NULL,
	[Color] [varchar](50) NULL,
	[Price] [decimal](18, 2) NULL,
	[ProductCode] [varchar](50) NULL,
 CONSTRAINT [PK_Product] PRIMARY KEY CLUSTERED
(
	[ProductId] ASC
)WITH (PAD_INDEX = OFF, STATISTICS_NORECOMPUTE = OFF,
 IGNORE_DUP_KEY = OFF,
ALLOW_ROW_LOCKS = ON, ALLOW_PAGE_LOCKS = ON) ON [PRIMARY]
) ON [PRIMARY]
After creating a database and table next we are going to Entity framework reference to project from NuGet package.
Adding Entity Framework Core package from NuGet
In this part, we are going to learn how to add Entity Framework Core package to project from NuGet package manager.
For adding a package from NuGet right-click on the Main project WebApplication10 and from the menu select Manage NuGet Packages. As you select it a New dialog of NuGet Package Manager with search box will pop up.
In choose browse tab and search Microsoft.EntityFrameworkCore.SqlServer and choose the latest version of Microsoft.EntityFrameworkCore.SqlServer is in the preview that why we have chosen them, finally click on the install button for adding the package.


After adding Microsoft.EntityFrameworkCore.SqlServer to project next we are going to Configuring Connection string in appsettings.json.
Configuring Connection string in appsettings.json
Here in ASP.NET core, we don’t have web.config file which was there in the older version of ASP.NET and ASP.NET MVC here we have appsettings.json file where we are going to keep application-level settings and this file is Json based.
appsettings.json file
In this file, we have added ConnectionStrings section inside that we have added DatabaseConnection key and other is value.
Notice: – here I am using SQL based authentication for database connection that why I have added User Id and password of SQL server.
{
  "Logging": {
    "LogLevel": {
      "Default": "Warning"
    }
  },
  "AllowedHosts": "*",
  "ConnectionStrings": {
    "DatabaseConnection": "Data Source=SAI-PC\\SQLEXPRESS; initial catalog=Sample2; user id=sa; password=Pass123"
  }
}
Next, after adding connection string we are going to add Model Product in Models folder.
Adding Product Model
using System;
using System.Collections.Generic;
using System.ComponentModel.DataAnnotations;
using System.ComponentModel.DataAnnotations.Schema;
using System.Linq;
using System.Threading.Tasks;

namespace WebApplication10.Models
{
    [Table("Product")]
    public class Product
    {
        [Key]
        public int ProductId { get; set; }
        public int Name { get; set; }
        public int Quantity { get; set; }
        public int Color { get; set; }
        public int Price { get; set; }
        public int ProductCode { get; set; }
    }
}
After adding Product Model next we are going to add the ProductView Model which we are going to Use on View for binding data to control.
Adding ProductView Model
using Microsoft.AspNetCore.Mvc.Rendering;
using System.Collections.Generic;

namespace WebApplication10.Models
{
    public class ProductViewModel
    {
        [DisplayName("Product")]
        public string ProductId { get; set; }
    }
}
Next, after adding Product and ProductView Model we are going to add DatabaseContext Class and inheriting with DbContext class.
Adding DatabaseContext Class and inheriting with DbContext class
We are going to add DatabaseContext class which will inherit DbContext class and DatabaseContext constructor accepts the DbContextOptions as an argument. The DbContextOptions carries the configuration information needed to configure the DbContext.
After adding DatabaseContext class we have defined DbSet entity for product Model.


using Microsoft.EntityFrameworkCore;
namespace WebApplication10.Models
{
    public class DatabaseContext : DbContext
    {
        public DatabaseContext(DbContextOptions<DatabaseContext> options) : base(options)
        {
        }
        public DbSet<Product> Product { get; set; }
    }
}
After Configuring DatabaseContext class next we are going Register DatabaseContext as a service.
Code Snippet of ConfigureServices in Startup Class
public void ConfigureServices(IServiceCollection services)
{
    var connection = Configuration.GetConnectionString("DatabaseConnection");
    services.AddDbContext<DatabaseContext>(options => options.UseSqlServer(connection));
    services.AddControllersWithViews();
}
Now we can use DatabaseContext class as service for dependency injection in the entire application.
Adding Controller
In this part, we are going to add Controller with name ShowProductController Controller after adding controller we have default Index action method in it.
using Microsoft.AspNetCore.Mvc;
namespace WebApplication10.Controllers
{
    public class ShowProductController : Controller
    {
        public IActionResult Index()
        {
            return View();
        }
    }
}
Next, we are going to inject DatabaseContext dependency via Constructor injection. The IOC container will resolve DatabaseContext dependency at runtime automatically.
using Microsoft.AspNetCore.Mvc;
using WebApplication10.Models;
namespace WebApplication10.Controllers
{
    public class ShowProductController : Controller
    {
        private DatabaseContext _databaseContext;
        public ShowProductController(DatabaseContext databaseContext)
        {
            _databaseContext = databaseContext;
        }
        public IActionResult Index()
        {
            return View();
        }
    }
}
After Configuring Constructor injection next we are going to assign a list of products from the database to ViewBag with Listofproducts property.
using Microsoft.AspNetCore.Mvc;
using Microsoft.AspNetCore.Mvc.Rendering;
using System.Linq;
using WebApplication10.Models;

namespace WebApplication10.Controllers
{
    public class ShowProductController : Controller
    {
        private readonly DatabaseContext _databaseContext;

        public ShowProductController(DatabaseContext databaseContext)
        {
            _databaseContext = databaseContext;
        }

        public IActionResult Index()
        {
            var productsList = (from product in _databaseContext.Product
                                select new SelectListItem()
                                {
                                    Text = product.Name,
                                    Value = product.ProductId.ToString(),
                                }).ToList();

            productsList.Insert(0, new SelectListItem()
            {
                Text = "----Select----",
                Value = string.Empty
            });

            ViewBag.Listofproducts = productsList;
            return View();
        }
    }
}
Adding Index View and binding dropdown
Next Adding Index View. For Adding View just by right-clicking inside Index Action Method and from the list choose Add View option a new dialog will pop up which will have View Name same as Action Method Name Index next we are not going to choose Template and Model class for this View just click on Add button to create View.
After Creating Index View Next on Index View first we are going specify ProductViewModel model object which we are going to send from Index Action Method.
On View we creating dropdown using new tag helper which helps to apply CSS with intelligence which was not available in HTML helper method.
<select asp-for="ProductId"
        class="form-control"
        asp-items="@(new SelectList(ViewBag.Listofproducts,"Value", "Text"))">
</select>
Code Snippet of Index.cshtml
@model ProductViewModel
@{
    ViewData["Title"] = "Index";
}

<div class="col-md-4">
    <form asp-controller="ShowProduct" asp-action="Index" method="post" role="form">
        <div class="form-group">
            <div class="alert-danger" asp-validation-summary="ModelOnly"></div>
            <label asp-for="ProductId"></label>
            <select asp-for="ProductId"
                    class="form-control"
                    asp-items="@(new SelectList(ViewBag.Listofproducts,"Value", "Text"))">
            </select>
        </div>
        <div class="form-group">
            <input id="Submit1" class="btn btn-success" type="submit" value="submit" />
        </div>
    </form>
</div>
After adding dropdown list on View next we are going to run an application to have a look at how it renders.


Next, let’s read selected value after posting form for doing that we need to add another action with similar action method Name ‘Index’ but this will handle Http POST request.
 [HttpPost]
 public IActionResult Index(ProductViewModel productViewModel)
 {
     var selectedValue = productViewModel.ProductId;
     return View(productViewModel);
 }
Let’s run application and select value from the dropdown list and submit the form to see we are able to read the value of a selected item of the dropdown list.

Reading Selected Dropdown Value after submitting the form
In Debug mode you can see productid value which we have selected form.

